post

Why Power Surges Happen and How to Prevent Them

Electricity arcing out of a home wall outlet.

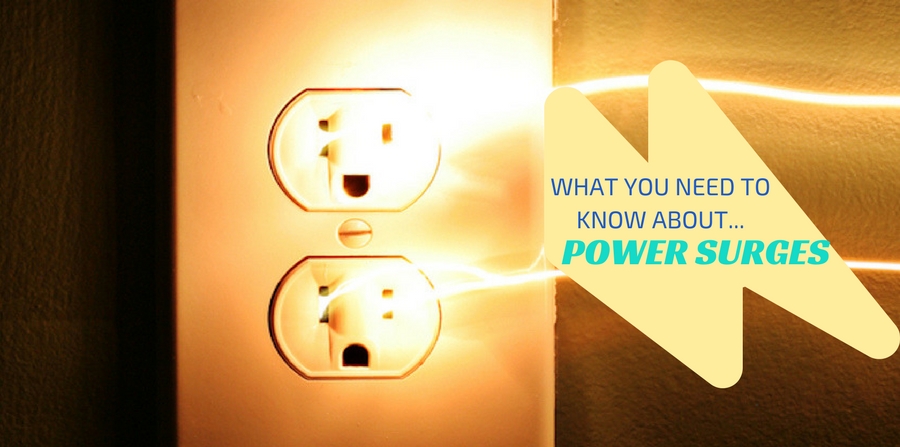
Los Angeles homes have more electronic devices plugged in and drawing power now than ever before. While modern electrical grids can supply power evenly and safely, power surges can result from several causes outside and inside the home.

Every homeowner should understand the basics about power surges and how to prevent them. Over time, even small power surges can cause damage to appliances and devices. Here’s a quick primer on everything you should know about power surges, and what you can do to stop them.

Graphic depicting voltage spike inside of a home electrical wire

What is a Power Surge?

A power surge is an extremely fast and intense power spike in your home’s electrical current. Surges are also referred to as “transient voltage” because they’re caused by the sudden presence of an overvoltage traveling through an electrical system.

Wall outlets normally supply 120 volts of AC power, but the actual voltage level in the system fluctuates between 0-169 volts. Most home appliances and devices are designed to handle this small fluctuation but an increase above 169 volts is considered a power surge. When a surge travels into your home’s electrical current, the voltage spikes can be damaging and dangerous.

Lightning storm at night

What Causes Power Surges?

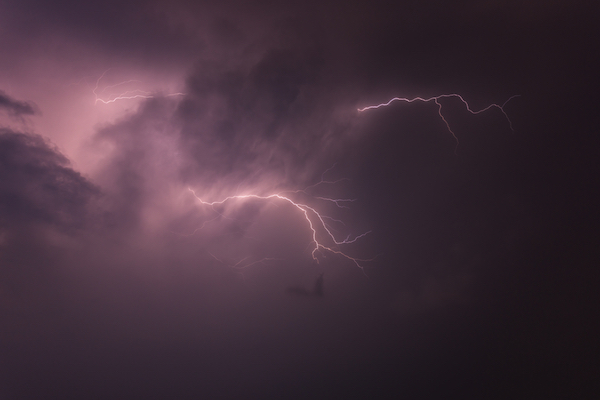
Most people associate power surges with lightning. When lightning strikes near a power line, its energy discharge can boost the line’s electrical pressure by millions of volts. That electrical boost runs through the power line and into your house, and BOOM!

Luckily, lightning is one of the rarest causes of power surges. Most surges are a bit more mundane.

High-powered home appliances such as air conditioners and refrigerators require a lot of power to switch on. When these appliances request this power, they can inadvertently create a spike in your electrical system. These “switching surges” aren’t as severe as lightning surges, but they can still do damage and wear other circuits over time.

Surges can also come via the power company. Your electrical company occasionally switches grids to access different power sources. When these switches occur, there may be an accidental surge of electricity. A transformer malfunction or faulty transmission line can also create an unwanted power surge in your house.

power strip set on fire by power surge

Why Are Surges a Problem?

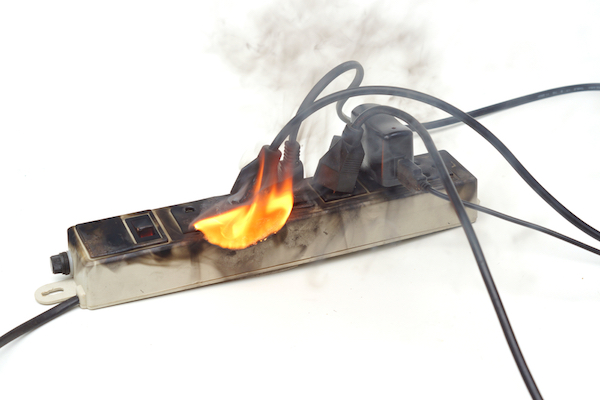
Simply put, power surges with large voltage spikes can be damaging or dangerous. Surges can damage or destroy plugged-in electrical devices.

When too much electricity flows through an appliance at once, the appliance could overheat, break down, or even catch fire.  This uncontained arc generates heat, which could melt or erode appliance components. A severe enough surge could even start a fire!

close-up of surge protector

How Can I Prevent Electrical Surges?

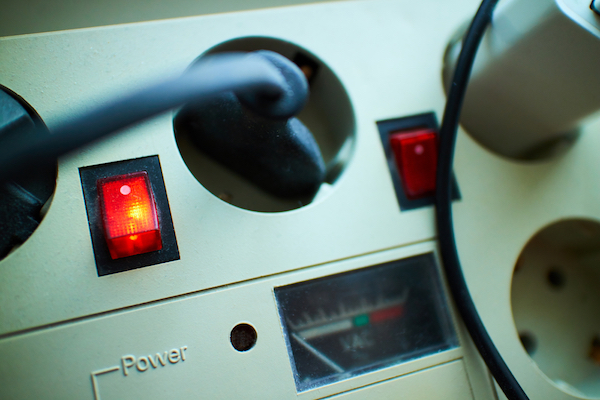
The easiest and best way a homeowner can protect against power surges is to use a surge protector. Surge protectors are a type of power strip. They contain one input to be plugged into the wall, and several outlets to plug other devices into. Newer versions also have a power surge USB port to protect your USB devices while they are plugged in.

The difference between a power surge protector vs power strip is surge protectors absorb any excess energy running through them. During a surge, the protector redirects excess voltage toward the grounding wire to neutralize it. Service-panel surge protectors work the same way, but they fit directly onto your circuit breaker to prevent power surges from entering your home’s electrical system.

Reduce the Risk of Power Surges in Your Home

For more information on power surges, check out the National Institute of Standards and Technology’s informational booklet.

If you need help with any electrical problem, give Mike Diamond a call today. Our fully licensed electrical contracting professionals have the experience and know-how to diagnose and repair any problem with your electrical system. We can help prevent dangerous overvoltage from causing damage in your home.

The post Why Power Surges Happen and How to Prevent Them appeared first on Mike Diamond Services.

Did you miss our previous article…
https://tkoplumbingco.com/?p=436

post

How Does Pipe Corrosion Work?

>
A rusted pipe springs a leak.

Pipes don’t last forever. Even copper pipes, despite their 50+ year lifespan, develop corrosion over time and in certain conditions. How does pipe corrosion affect your plumbing and your home’s water? And how do you prevent your pipes from corroding?

Corrosion affects different types of pipes in different ways. Cast iron pipe corrosion looks different than galvanized pipe corrosion and it can be caused by several factors. The bottom line: we want your plumbing and the water you drink to be safe.

What are the Causes of Pipe Corrosion?

Corrosion is an electrochemical electron exchange. This means the metal in your pipe loses electrons due to contact with another substance. This wear on a molecular level becomes bigger and bigger and eventually leads to rust, clogs or leaks.

Here are some of the more common causes of corrosion in metal pipes:

Low PH. A low PH (less than 7) indicates that your water is acidic. Acidic water can dissolve pipes from the inside and a common cause of copper pipe corrosion.High oxygen. A higher level of oxygen in your water can accelerate oxidation or rust. Unchecked rust that builds up over time will corrode and block your pipes.Water properties. High mineral content in hard water can cause calcification and lead to mineral buildup. Metals in water can cause galvanic corrosion where electrons transfer from metals with high electron count to metals with fewer electrons.Electrical currents. An ungrounded electrical current can travel down a copper pipe and stimulate a corrosive reaction.High velocity. Water traveling at a high velocity, especially hot water, can wear out your pipes prematurely.

How Does Pipe Corrosion Affect My Water?

Depending on the type of pipes you have, corrosion will affect your water in different ways. These effects can include:

DiscolorationTurbidity (cloudiness)Bitter tasteFoul odorHealth problems

Iron pipes will rust and eventually clog. The additional iron in your water can result in reddish colored water. While added iron doesn’t pose a health risk, the taste may be unappealing.

Copper pipes may produce blue colored water or water stains. This blue color indicates the presence of copper in your water due to corrosion. Too much copper can cause health problems that lead to liver or kidney damage. Luckily, the problem is visible well before it becomes a health risk.

Plastic and PVC pipes resist corrosion but because they are a newer material, there is not a lot of data on their long-term properties. The primary risk for corrosion is along joints and connectors where metal or rubber parts are used.

Lead pipes are extremely dangerous when corroded. Lead in water can cause serious health problems, especially in children. If you have lead plumbing anywhere in your home, have it replaced immediately and don’t drink your water.

How Does Pipe Corrosion Affect My Plumbing?

Water pipe corrosion inside your home can create numerous problems including:

A hole rusted into an iron pipe.
Low water pressureLeaksPinholesBreaksRust stainsDamaged appliances

As your pipes corrode, they can develop small holes or cracks that eventually lead to large breaks and flooding. Interior corrosion can slow water pressure or clog your faucets and water heater. Rust might stain your sink.

If you’ve noticed lower water pressure, higher water bills and cloudy or discolored water, you probably have pipe corrosion somewhere in your home. Pipes can become thin or brittle without visual evidence.

How to Prevent Corroded Pipes

Have a certified plumber check your pipes to make sure they are safe and working properly. This is best way to be certain to be sure corrosion isn’t destroying your plumbing and to maintain healthy water in your home.

If your water is a problem, take a Langelier Saturation Index (LSI) test to determine what is causing the corrosion. The LSI test is a standard water quality test that measures:

PHConductivityTotal dissolved solidsAlkalinityHardness

*Note: The Langelier test does not identify lead in water. A separate, lead specific, test is required.

A water softener or water filter, hard wired into your water supply, can treat harsh water before it travels through your pipes. Use a water softener to remove excessive minerals that create buildup and make washing difficult. A water filter can remove chemicals and bacteria that accelerate corrosion. It will also remove make your water taste better!

How to Clean External Copper Pipe Corrosion

Copper pipe green corrosion is the result of oxidation. This patina is similar to rust in other types of pipes. Over time, this type of corrosion can lead to bigger issues.

A copper pipe covered in blue corrosion.

To clean your copper pipes, you can use one of two methods:

A commercial metal polish designated for copper.A paste of white vinegar, salt and flour.

Follow the package instructions if using the commercial polish. To use the natural paste, brush it on to the affected areas and wait for ten minutes. The acid in the vinegar should loosen the alkali stains. Wipe away with a clean cloth. Repeat as necessary.

Repair or Replace Your Corroded Pipes

Don’t wait for rust colored water and damaged walls to let you know you have a significant plumbing issue. While pipe replacement can be a big job, the alternative can be much worse. Call or contact Mike Diamond today for a certified technician to examine your pipes for corrosion. We can help you decide the best course of action when corroded pipes compromise your water.

The post How Does Pipe Corrosion Work? appeared first on Mike Diamond Services.

Did you miss our previous article…
https://tkoplumbingco.com/?p=431

post

How to Unclog a Toilet

>
Unclogging a toilet

As the old saying goes – there’s more than one way to unclog a toilet. OK, we just made that up but we’re here to prove it’s true. Sure, we love our plunger, but what if you don’t have one? Have you tried soap or baking soda?

Follow our detailed instructions for how to unclog a toilet with a plunger but stick around for plunger-less toilet clog hacks too. One way or another, we’ll get your toilet unclogged and return things to business as usual.

How to Plunge a Toilet

Flange plunger

The best way to unclog a toilet is to learn to use a flange plunger properly. Flange plungers are made specifically for plunging toilets. The “flange” is an extended, sleeve-like rubber flap built into the underside of the plunger’s rubber cup. Insert this flange directly into the toilet bowl’s drain hole to ensure a tighter seal than a conventional cup plunger.

1. Prepare the area around the toilet

Plunging can get messy. Put on rubber gloves and lay out towels or plastic wrap to catch spills.

2. Level out the amount of water in the bowl

To maximize plunging effectiveness, you’ll want to fill the toilet bowl about halfway full with water (enough so that you can fully submerge the plunger cup).

3. Place the flange into the toilet drain

Maneuver the flange until it fits snugly into the top of the toilet bowl’s drain. Insert the flange at an angle so the flap fills with water as you lower it.

4. Fit the cup over the drain

Fit the cup of the plunger snugly over the drain while keeping the flange inserted. As you create the seal, let water from the bowl under the cup. The water between the cup and the drain will help generate suction pressure to unclog.

5Position and “test” your plunger seal

When you’ve created a seal with both the flange and cup, “test” it before getting started. Depress the plunger straight down and then tug it back up the way you would to unclog normally, but do so slowly. Make sure the seal stays in place throughout the process.

5a. (Optional) Apply petroleum jelly around the cup of the plunger

If you’re having trouble maintaining a seal, try applying petroleum jelly to the cup. Petroleum jelly will help keep the cup from sliding off of the bottom of the bowl.

6. Plunge forcefully 5 to 6 times

Push down on the plunger forcefully to drive the cup down and drive the flange into the drain, then pull the cup back up to “reset.” Repeat this motion repeatedly and steadily, but not too forcefully or rapidly, for 20 seconds.

7. Check water level in toilet bowl

After plunging for thirty seconds, quickly break the seal and remove the plunger. Listen for a gurgling sound from the drain (a good sign) and check the water level in the toilet bowl. If nearly all the water drained from the bowl, then you’ve probably cleared the clog.

7a. (Optional) Repeat plunging as necessary

If the water in the toilet bowl didn’t drain, repeat the plunging process a few more times. Add or bail water as necessary until your bowl is half full before you start again.

8. Test to see if the clog is gone

Before you test your flush, remove the tank lid. Depress the handle as usual and watch the toilet bowl closely. If you haven’t cleared the clog, then the toilet won’t flush, and the bowl will start filling with water. Prevent an overflow by manually closing the toilet’s flapper.

We recommend you only re-try your plunging up to five times. Plunging for too long could damage your toilet, and some clogs are too stubborn for even the most effective plumbing.

How to Unclog a Toilet Without a Plunger

Worst case scenario: you only have one toilet in your home, it’s clogged, you’re without a plunger and you have a dinner party starting in two hours. Stay cool. We’ve got a few more of Mike’s diamonds to get that toilet flushing again.

How to Unclog a Toilet with Dish Soap

Dish soap has natural properties that break down grease and grime in solids. It can also serve as a lubricant to get things moving.

Simply squirt a generous cup or so of your favorite soap into your toilet’s drain. Follow the soap up with a bucket of hot (not boiling) water. Water that is too hot may crack the porcelain. Wait 30 minutes and check. Repeat if necessary.

How to Unclog a Toilet with Baking Soda

Sprinkle a cup of baking soda around your toilet’s drain. Slowly add two cups of white vinegar. Allow the chemical reaction an hour to reach the clog and work its magic. You could follow up with a bucket of hot water as mentioned above. Repeat the process if necessary.

How to Unclog a Toilet with Poop in It

A bottle of coke.

Yep, we said it, but that’s the way it goes. Sometimes after your uncle has spent the better part of the morning in your bathroom, you have a very unpleasant clog.

The secret here is Coca Cola. Not for your uncle, for your toilet. Turns out, coke has some awesome acids that double as unclogging agents. The carbonation also helps by putting pressure on the clog.

Pour a can or half liter bottle of coke into your toilet and then quickly cover the bowl with plastic wrap. This will help keep the pressure in. After the hour, enough dissolving should have taken place to allow a normal flush.

Unclogging LA’s Toilets the Right Way

If you’re dealing with a stubborn clog that won’t budge, then call Mike Diamond. Our expert plumbers have yet to meet a clog they couldn’t clear. 

The post How to Unclog a Toilet appeared first on Mike Diamond Services.

Did you miss our previous article…
https://tkoplumbingco.com/?p=426