post

How Air Conditioning Works

>
An air conditioning unit outside the home.

Before 1902, humans adopted creative ways of staying cool during hot summers. The ancient Egyptians hung wet reed mats in their windows that created a cooling effect when the wind blew through. Ancient Romans went so far as to pump cold water from aqueducts through the walls of elite homes.

These days you need only turn your thermostat dial for sweet heat relief in your home. But what exactly happens when you turn that magic dial? And how do you fix your AC when it doesn’t click on? Mike Diamond is the fresh smelling man with the answers to all things cool. We’ll cover the parts of a home ac system and explain how the air conditioning system in your house works. If your AC isn’t working, we’ll troubleshoot the common reasons why.

Who invented Air Conditioning (and the summer blockbuster)?

The man credited with inventing air conditioning as we know it is Willis Carrier. At the turn of the 20th century, he had an epiphany while standing on a train platform. He realized that humidity could be removed from air causing it to feel colder. Willis built a system of ice chilled coils that kept mills and printing companies cool during hot industrial workdays.

A dark movie theater interior.

Stuart Cramer invented a ventilation device around the same time that was used in textile plants to distribute cool vapor to hot air. He was also the person to coin the term “air conditioning.” In 1925 he invented a more efficient version of his device for a movie theater. Soon his device was in theaters across the country. Ever since, Americans have flocked to the movies to escape the summer heat and thus was born the summer blockbuster season.

How Does Air Conditioning Work?

Modern air conditioning works via the physical principal of phase transition. This law states that when a liquid converts to a gas, it absorbs heat energy. Like when you boil water to create steam.

The liquid in this instance is a refrigerant or chemical compound that evaporates and condenses over and over to cool your home. The refrigerant starts as a liquid that travels through an evaporation coil inside your home. As the liquid evaporates it absorbs heat and, in this case, that heat is from warm air from your home. As the heat is removed, the resulting cool air is distributed back into your home.

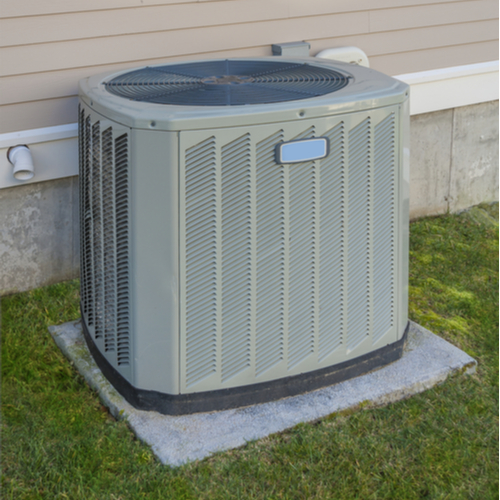
The used refrigerant gas is then sent to your air conditioner compressor – that’s the big unit outside – where it is compressed back into a liquid. The hot air that is a byproduct of the process (remember phase transition) is vented outside and the condenser aids the compressor in sending the liquid refrigerant back to the evaporator coil where the cycle begins all over again.

How HVAC Systems Work

HVAC stands for heating, ventilation and air conditioning. Your home’s central air takes advantage of the existing ducts and vents in your home that are also used by your furnace during colder months.

After warm air travels over the evaporation coil and is cooled, fans blow the chilled air through your ducts and vents to reach every room of your home. This network delivers cold air evenly and efficiently throughout your home.

The thermostat connected to your HVAC system regulates all temperatures for both your heating and air conditioning. Each system responds based on the setting you input. Having one central control makes it easy to stay comfortable all year long.  

Why Won’t My Air Conditioner Work?

Like any piece of equipment, air conditioners are subject to break down and failure. Common reasons air conditioners malfunction include:

A repairman examines a air conditioning unit.
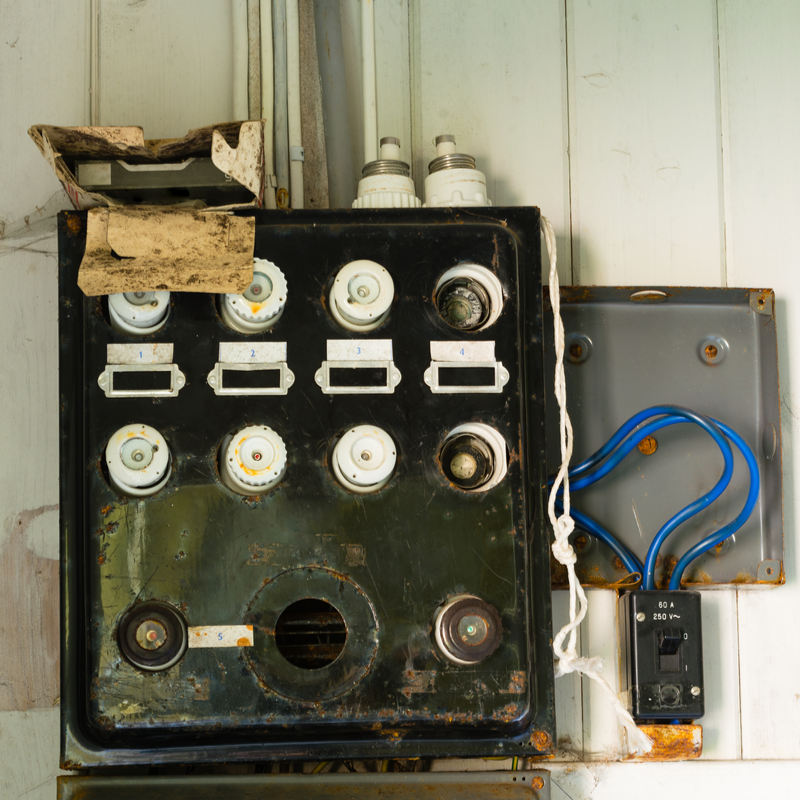
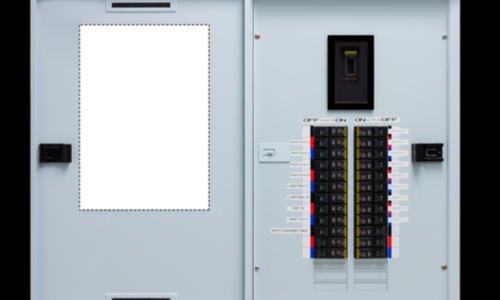
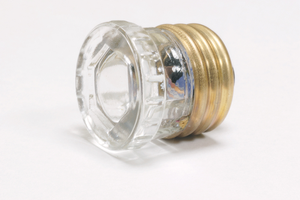
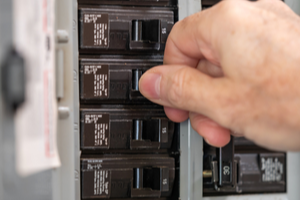
No power.Blown fuse or tripped circuit.No signal from the thermostat.Too hot outside to keep up.Dirty or blocked air condenser.Dirty air filter.Broken fan.Problems with refrigerant.Unit not the right size for your home.Older unit (10+ years).Leaky air ducts.

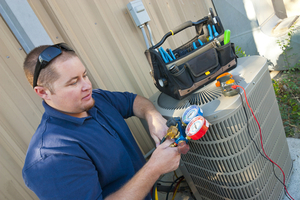
Some of these issues are easier to address than others. If your air conditioner is not working, make sure its receiving power. Check that the circuit isn’t tripped and that your thermostat has fresh batteries. Then make sure your filter is clean and check your compressor for obstructions like brush or grass. If you’re still having problems, it may be time to have a professional technician look at it.

ir Conditioner Repair Service for Los Angeles

Mike Diamond knows air conditioning and HVAC systems. When things heat up, don’t lose your cool. Call or contact Mike Diamond for fast, reliable air conditioner service in Los Angeles and the surrounding area.

The post How Air Conditioning Works appeared first on Mike Diamond Services.

Did you miss our previous article…
https://tkoplumbingco.com/?p=421

post

How to Fix a Toilet That Won’t Flush

>
Person flushing their toilet

Stuck in that awkward plumbing limbo where your toilet won’t flush? Fear not. We’re here to explain the most common reasons your toilet may not be flushing and how you can fix them. If you live in L.A., your local plumbers at Mike Diamond are always ready to help.

Your toilet may be clogged (even if you can’t see it) or it may not be getting enough water.  Any number of working parts could be faulty too. Before the next person in your home needs to go, let’s, ahem, plunge in and help you fix that toilet that won’t flush.

Plunger in a toilet

Your Toilet is Clogged.

An obvious reason why your toilet won’t flush, but a necessary one to consider is that it’s clogged. Never flush anything other than toilet paper and waste down your toilet. Wipes and other items can build up and block your sewer line. Clogs may not be visible if they’re further down the line.

A partial clog somewhere in the line could mean that your toilet will still flush but not very strong. A way to test for a partial clog is to pour a bucket with a gallon of cold water into the bowl. If your toilet still doesn’t flush properly, you probably have a partial clog.

What to do: Use a plunger or toilet auger to loosen things. Make sure you use a flange plunger, since the cup will help you create a better seal in the toilet bowl. Another way to loosen things is to turn off the toilet’s water, flush it, and then add hot (not boiling) water to the bowl. Let the water sit for several minutes, then flush it. If that doesn’t work, either, you should consider snaking the toilet.  If your toilet still won’t flush after trying any of the above methods, you may want to consider professional drain cleaning services.

Check Your Toilet’s Handle and Chain

If the handle doesn’t do anything when you flush, you may have an easy fix. The handle connects to the flapper (the valve that holds the water in the tank) via a small length of chain. A simple explanation may be that the chain got disconnected at either end.

It’s also possible that the chain is the wrong length. When you depress the handle, the chain yanks up the flapper to initiate the toilet’s flush. If the toilet chain is too long, it won’t be able to yank up the flapper. If the flapper doesn’t rise, the toilet doesn’t flush. If the chain’s too short, then then your toilet flapper won’t seal properly and your toilet will run without ever completely filling with water.

What to do: Lift off the lid of your toilet tank. Check that both ends of the chain are connected. If they aren’t clip them back into place. If they are, pull the handle to test that the chain is the right length to lift the flapper fully open and also allow it to close tightly.

Why Won’t the Flapper in the Toilet Close?

As mentioned above, the flapper is the rubber valve at the bottom of your toilet’s tank. A toilet’s flapper opens and closes whenever you flush, allowing water to run from the tank into the bowl. When you depress your toilet’s handle, you’re lifting the flapper. Your toilet’s flapper is in constant contact with moving water that, over time, can bend or otherwise warp the flapper.

What to do: Examine your flapper. Does it seal tightly when it’s closed? Can you see wear or damage? Flappers are inexpensive and available at any local hardware store. Turn off the water at the supply valve, drain your toilet tank and replace the flapper. Make sure you reattach the chain. If you need help, we’re standing by.

djust or Replace Your Overflow Tube

Your toilet’s overflow tube is a part of the tank near the refill tube. Overflow tubes help empty water directly into the toilet bowl during a flush. These tubes are not infallible, unfortunately. The toilet’s constant pressure can easily crack or otherwise damage them. If the tube does crack, water will run into it instead of past it.

What to do: Replace the overflow tube to restore its ability to work. If your overflow tube isn’t working, give us a call and we’ll diagnose the problem and install the proper part.

Your Toilet Tank isn’t Filling Up All the Way

When you flush your toilet, you release water from the tank into the bowl. Releasing a lot of water into the bowl quickly generates the suction required to flush the toilet. When the tank doesn’t contain enough water, it doesn’t create the necessary pressure for a strong flush. You may notice a weaker flush, or no flush at all.

What to do: Open the tank of your toilet to locate the float and the fill line. Flush the toilet with the tank open and watch the water drain into the bowl and fill back up. If the tube stops adding water before the float reaches the fill line, then your toilet won’t be able to perform a full flush. Adjust the float by moving its position on the arm that connects it to the refill tube. Flush again and see if you’ve solved the problem.

weak toilet flush

Clean Your Toilet Jets

The toilet jets are the little holes along the underside of the toilet bowl rim. When you flush, the water from the tank above rushes down through these small openings to create the swirling action you see. If they become clogged with lime or corrosion, it will limit the strength of your flush.

What to do: Get a small nail, length of wire or toothbrush and clean the jets. Use watered down bleach or a solution of vinegar. Place a small mirror on the underside of the rim to see which jets are clogged and dig out any blockage to restore them.

Fix Your Toilet that Won’t Flush

Hopefully, you’ve diagnosed the reason why your toilet won’t flush, and everything is moving again. If it’s still not working and you want Los Angeles’ best plumbers to have a look, call or contact Mike Diamond. We’re the plumbing experts who’ll turn your frustrations into flush elations.  

The post How to Fix a Toilet That Won’t Flush appeared first on Mike Diamond Services.

post

Why Is That Light Bulb Flickering?

A flickering light bulb is the electrical equivalent of a dripping faucet. It may not seem like a big deal but soon enough it will start chipping away at your sanity. Before you throw the lamp and the table it was on out the window, let us diagnose the issue.

Flickering lights don’t have to be your dim future when you keep your home’s electricity working great. Once you figure out what’s causing the flickering, you may be able fix the problem yourself. Here’s a list of possible reasons why different lights may flicker and how to fix the problem.

1.Does Your Light Bulb Have A Loose Connection?

The most obvious and easily fixed reason why your light bulb is flickering is that it’s not properly seated in its socket. If this is the case, it’ll periodically disconnect from its power supply.  When the bulb flickers quickly and repetitively, it’s continually re-connecting and disconnecting from the power in the lamp. If the light flickers when you nudge the lamp, then the bulb is probably loose.

Fixing a loose bulb is hopefully as easy it sounds, and you just need to tighten it. Once it’s fully tightened, the bulb’s receiver should be properly connected with the lamp’s power supply. To tighten your bulb, simply make sure the bulb is cool enough to touch and turn it clockwise in its socket. Don’t try to force the tightening; if it’s not easy to turn, the issue may lie elsewhere.

2. Is Your Light Bulb Faulty?

If the bulb is tight but still flickers constantly, it could be faulty or burned out. Incandescent light bulbs can stop working correctly for all kinds of reasons. Contact problems, faulty wiring connections, worn-out receptacles, or a bad filament can all cause flickering. Often, these problems occur as the light bulb ages. They could also happen as the result of wear-and-tear, improper voltage, or bad wiring inside the fixture.

Older fluorescent lights won’t turn on sometimes and are more prone to flicker if they are dying. You can try rotating a bulb in its fixture to create a better connection, but chances are, it needs to be replaced.

Replacing light bulbs is easy and relatively cheap. As long as you tightened the new bulb correctly, your flickering should stop. If not, read on.

3. Is Your Light Bulb Fixture Causing it to Flicker?

An easy way to check if your light fixture is the problem is to remove the light bulb and try it in a different fixture. If it works, it may indicate that the first fixture is the problem. Over time sockets can wear out and the metal components no longer make a secure connection. The internal wiring could also be faulty.

A worn out fixture will need to be repaired or replaced. If the fixture is connected to your home, you may wish to have a professional electrician make the repair or replacement.

Is the fixture faulty?
4. Is the Light Switch or Circuit Causing Your Lights to Flicker?

If it’s not the bulb or the light fixture, it may be that your home’s wiring is the reason why your light bulbs are flickering. A bad connection in your fixture’s on/off switch may result in irregular flickering. If you wiggle the switch and the light flickers, you’ve likely found the problem and you can replace that switch.

If you experience multiple lights flickering, especially when you have other appliances running, it may be an overloaded circuit. Your home is wired on different circuits – usually room by room – that deliver a finite amount of electrical current. If you have too many items plugged in or are drawing too much power from the circuit, it may affect your lights. You’ve probably seen this when you turn on a high-power appliance like a blender and the kitchen lights dim.

If your home’s wiring is older, it may not be keeping up with increased power demand. A professional electrician can replace your service panel and supply your home with more amperage to meet your needs.

5. Why Is Your LED Light Blinking on and Off?

You’ve upgraded your home to more efficient and longer lasting LED bulbs. Good plan. But are you using a dimmer switch? Not all LED bulbs are dimmable. Only certain kinds that are labeled “dimmable” will work, especially with an older dimmer switch.

You can replace the light bulb with the proper type, but you may need to upgrade your dimmer switch as well. A professional electrician can advise you on the best way to upgrade your lights and switches to make sure they are compatible and function properly.

How Many Times Do You Need to Change Your Light Bulbs?

If flickering bulbs and lights that don’t work properly have left you in the dark, give Mike Diamond a call. We’re your L.A. area experts for all your home plumbing and electrical needs. And even when you can’t see, we’re your “smell good plumber!”

The post Why Is That Light Bulb Flickering? appeared first on Mike Diamond Services.

post

Fuse Box vs Circuit Breaker

A fuse box or circuit breaker is the center of your home’s electrical system. It diverts the electricity from your utility company to all parts of your home. It also provides protection from overload, short circuit or ground fault by turning off the power when wires become too hot.

Most homes use circuit breakers. You can find them in your service panel box which is usually located in the basement. If your home was built before 1960 and your electrical system hasn’t been updated, you may have a fuse box instead. While both systems essentially perform the same function, there are reasons most homes upgrade to circuit breakers.

The Difference Between a Fuse and a Circuit Breaker

Determining whether you have fuses or circuit breakers in your home is easy. Locate your service panel – that’s the metal box containing your electrical circuits – and open it up.

When you open the door, you’ll see rows of either circular plugs or rectangular switches. If you have plugs – which look like the end of a lightbulb – you’ve got fuses. If you see a column of switches, you’ve got circuit breakers.

How Fuses and Circuit Breakers Work

Circuit breakers and fuses both serve the same function: to protect your electrical system from overloading and causing a fire. The difference is how they each achieve this.

Fuses. Those little plugs you see have a filament inside of them that will melt if the circuit gets too hot. When that filament melts, electricity is no longer able to travel to that circuit until you replace the “blown” fuse. You can see the filament through the clear window at the top of the plug and identify if it’s melted or not. A cloudy window is a sign of a blown fuse.

Circuit breakers are electromagnetic on/off switches that control the current to each circuit in your home. When a circuit draws too much power and overloads, the switch receives the surge first and flips off or “trips.” Normally you can unplug whatever overloaded your circuit and simply flip the power back at the tripped circuit breaker.

The Pros and Cons of a Fuse Box vs Circuit Breakers

It’s generally agreed that an old fuse box should be replaced with circuit breakers. While fuses worked well for a time, circuit breakers are more convenient and can handle higher electrical loads more safely. These days, most families run multiple devices that require more amperage. If you are considering fuse box replacement, it’s a great time to beef up your home’s electrical capabilities.

If you have an electric fuse box and a fuse blows, you’ll need to replace it with a new one. That may mean a trip to the hardware store. It also means unplugging everything in the circuit, standing on a rubber mat and making sure you’re replacing the blown fuse with the proper type. Different fuses are rated for different amperage. If you introduce a 20-amp fuse to a 15-amp circuit, it may try to draw more power than it can handle and you risk fire.

My Circuit Breaker Keeps Tripping, Why?

Hopefully, we’ve made a strong case for upgrading from a fuse box house to a circuit breaker house. The benefits certainly outweigh the disadvantages but that’s not to say that circuit breakers have their own quirks. Sometimes a circuit keeps tripping. Here are the possible reasons why:

A worn out breaker. Normally, when a circuit in your home trips, you simply find the offending switch in your service panel, flip it all the way “off” and then all the way “on.” If you have a circuit that keeps tripping regularly, you may need to replace it. Circuits that trip a lot do wear out. Remember, circuit breakers are there to protect you. If it continues to trip, it may indicate another issue.

An Overloaded circuit. The circuit connected to that breaker may have too many outlets or fixtures plugged into it drawing power. A professional electrician can diagnose the problem and rewire or add circuits if needed so that you receive enough electricity without overloading.A Short circuit or ground fault. Other reasons a circuit keeps tripping are a short circuits or a ground faults. These are similar issues where moisture or loose wires create a hazardous electrical connection. A mouse inside the wall may have chewed your neutral wire allowing it to come in direct contact with your hot wire. Or an appliance may have gotten wet allowing the hotwire and the ground to connect via moisture. You can test for these by unplugging everything in the circuit, flipping it back on and reintroducing items one at a time. If you plug an item in and the circuit trips again, you’ve most likely identified the problem.

While it’s possible to diagnose these electrical problems on your own and even replace your circuit breaker yourself, electrical work is dangerous. Having a trusted professional perform the work ensures that it gets done safely and properly.

Get Expert Advice on Fuse Boxes, Circuit Breakers and More

If you live in the Los Angeles metro area and you have outdated fuses, circuits that continually trip or want to know how you can upgrade the electrical in your home, give us a call. You can also contact us online to schedule your service.

The post Fuse Box vs Circuit Breaker appeared first on Mike Diamond Services.

Did you miss our previous article…
https://tkoplumbingco.com/?p=402