post

Why Am I Running Out of Hot Water?

>
Woman running out of hot water before the end of her shower

There are all kinds of reasons why your water heater isn’t producing enough hot water. It could be too small, the settings may be wrong, or there could be a more serious problem. Sediment buildup, broken dip tubes or heating elements, and leaks can all steal your hot water away.

By determining exactly how you’re running out of hot water, you can home in on the problem. Find the description that most closely matches your hot water issue below to find out what’s going on. Once you know why you’re running out of hot water so quickly, you can try to solve it yourself or you can call in the Smell Good Cavalry:

Your water comes out in spurts of hot and cold

If your hot water seems to run hot and cold randomly regardless of what you tell it to do, then there may be sediment build-up in your water heater’s tank. Sediment builds up faster when you have hard water, when your pipes are old, or if your anode rod is worn out. Sediment build-up leaves less space for hot water in the tank. It can absorb too much of the heat generated by the heating element.

First, try flushing and draining the tank. We recommend either doing it yourself or having the pros perform a full drain and flush around once per year. If you keep running out of hot water even after a flush, then it’s possible that too much sediment has built up. Unfortunately, the only way to solve that problem is to replace your tank. In fact, you should replace it quickly… or it could, uh, explode.

You keep running out of hot water after a very short period of time

Man running out of hot water during a shower

Most water heaters have two heating elements: one at the top, and one at the bottom. The top heating element repeatedly re-heats the water near the top of the tank. The bottom heating element heats all the water added to the tank to store it at a constant hot temperature. At least, that’s what it should be doing.

If your bottom heating element stops working, then it isn’t heating most of the water in your tank properly. Instead, you’ll be forced to rely on the small quantity of water your top element heats. When that water runs out, your water heater will send you unheated water instead… which makes for the nasty shower surprise you’re all too familiar with. To fix this problem, replace your tank’s bottom water heater element. Give us a call and we’ll take care of it fast.

Your water never gets above a lukewarm temperature

The water heater’s dip tube pushes the cold water to the bottom of the tank. There, the lower element heats it before you use it. If your water heater’s dip tube breaks, then all the replacement cold water added to the tank mixes with the hot water already inside. As a result, you get a lukewarm mixture of hot and cold water that satisfies nobody, like a reverse Goldilocks.

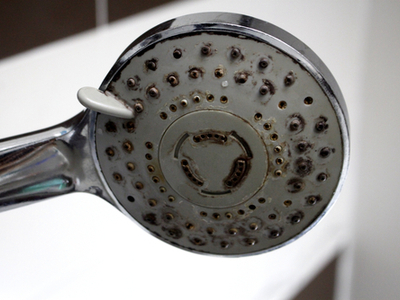
If your dip tube is broken, you may discover small chunks of plastic in your showerhead or sink strainers. Take off your showerhead and look for debris. If you find any, then you could try to test and replace your dip tube yourself, or call in the pros. Replacing a dip tube is relatively cheap, quick, and easy.

You’re running out of hot water before everyone is finished with it

water heater sizes. If your water heater is constantly running out of hot water, it may be too small for your home

Does this sound familiar? You’re locked in a constant competition against everyone in your home to seize the bathroom first thing in the morning. If you’re unlucky enough not to be the early bird, then you’d better shower quickly or risk a rude (and cold) awakening. And forget about showering while someone’s washing dishes, running the dishwasher, or doing the laundry – that’s a one way ticket to your own private Antarctica.

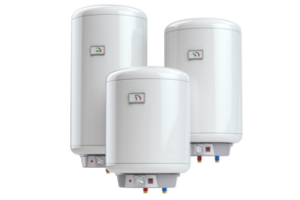
Your water heater is probably simply too small. Conventional water heaters can supply an amount of water equal to the size of their storage tank. If you use more water than the tank can provide, then your heater spends 20 to 30 minutes reheating new water. If your water heater is too small for your needs, you’ll have to replace it with a bigger one.

You’re not getting any hot water at all

Did you know that your water heater has a thermostat that dictates how hot your water gets? It works just like any other thermostat: you tell it how hot you want your water, and your elements heat to that temperature. If you’re not getting any hot water at all, then your thermostat may be malfunctioning… or simply set improperly!

Most water heaters have a reset button. Troubleshooting your thermostat is as easy as clicking that button. In case that doesn’t work, locate the thermostat itself and make sure it’s set correctly. If you still have the owner’s manual, the manufacturer should have included the settings inside. If you’re like 99% of people and you have no idea where that manual is, find the settings online. Reset to the heat you want, then try resetting again. If that still doesn’t do the trick, give us a call.


If you don’t see your particular issue listed here, don’t worry. These scenarios cover the common problems, but they’re by no means exhaustive. If you still don’t know what to do after either failing to find your problem or trying our proposed solution to no avail, you still have your trump card: us.

Whatever the strange, unique, unlikely reason you’re running out of hot water, Mike Diamond’s experts will find it and will provide a solution. We’ve yet to be stumped by even the most outlandish of hot water hang ups – and we’ve seen some doozies. Next time your shower takes an unpleasant turn for the freezing, just give us a call right away. Or at least… as soon as you get out and warm up.

The post Why Am I Running Out of Hot Water? appeared first on Mike Diamond Services.

Did you miss our previous article…
https://tkoplumbingco.com/?p=381

post

Is My Garbage Disposal Leaking?

>
Garbage disposal leaking from reset button

Garbage disposals usually leak from three places: the top, the pipe connections, and the bottom. To find out if your disposal is leaking, check each common place where leaks start. Use a flashlight to check for condensation, puddling, and other signs of water accumulation on or beneath your disposal.

Each common garbage disposal leak happens for a different reason. Usually, a minor component is simply too loose or it’s worn out. By finding where your garbage disposal is leaking, you’ll be able figure out why it’s leaking and how you can fix it. Here’s everything you need to know to fix your garbage disposal’s leak quickly and accurately.

Where is my garbage disposal leaking from?

Garbage disposals commonly leak from four different places:

The sink flange at the top of the garbage disposal. This connects the disposal to the top of the sink.The dishwasher hose connection on the side of the disposal. This is where the flexible plastic dishwasher hose connects to the disposal.The drain line connection, also located on the side of the disposal. This is where the main drain pipe connects to the disposal via curving metal or PVC plastic pipes.The reset button on the bottom of the disposal. This button deactivates the disposal if it jams or the motor overloads.

How can I tell if my garbage disposal is leaking?

Garbage disposal leaking from either the side or bottom

First, look for the obvious signs. Check under your kitchen sink for puddling water, dampness, dripping, or a musty smell. If you see any signs of leaking, check to make sure it isn’t the sink itself or the sink’s p-trap. Then, grab a flashlight and bucket to look for each common garbage disposal leak.

Turn off the garbage disposal and unplug it completely. Then, fill up the sink with water about halfway. If you have food coloring, add it to the water to make the leak easier to spot. You can locate the leak in the following ways:

The sink flange: Check for dripping or water accumulation around the top and bottom of the ring of the flange. Use the flashlight to look for water coloring and feel for wetness by hand.The dishwasher hose connection: To properly look for this leak, you’ll have to run your dishwasher. Start the dishwasher without turning back on the disposal. Watch the hose as water runs from the dishwasher drain through it into the disposal. Pay particular attention to the connections between the hose and disposal.The drain line connection: Check the connection between the drain line and disposal. Pay particular attention to the screws that fasten the line to the disposal and to the gap between the disposal and drain line.The reset button: The reset button is in the center of the bottom of the disposal unit. Shine the flashlight under the disposal to look for it. Check for a slow, constant dripping or water accumulation beneath the unit.

Why is my garbage disposal leaking?

Each of the four common leaks outlined so far have different causes and fixes. Here’s where your leak is coming from and what caused it:

The sink flange: The sink flange is held in place by plumber’s putty and bolts. If the putty deteriorates or the bolts rust or loosen, the watertight seal between the flange and sink may break, leading to your leak.The dishwasher hose connection: If the dishwasher hose is leaking, it’s usually because the screws holding it to the disposal have loosened. This can happen because of rust or simply as a result of time and jostling. It’s also possible the drain hose or clamp are leaking.The drain line connection: If the drain line is leaking, then either the screws securing to the disposal have worn out, or the rubber gasket inside the mounting assembly itself is leaking. Remove the screws, take down the drain line, and check the gasket inside for signs of wear and tear.The reset button: If your garbage disposal is leaking from either the reset button or any other part of the bottom of the disposal, then it probably means a seal inside the unit itself has worn out. This can happen when a garbage disposal gets old.

How to Fix a Leaking Garbage Disposal

Repairing a garbage disposal

Now that you’ve identified the where and why, you’re prepared to fix the actual problem. Luckily, fixing a leaking garbage disposal is usually pretty straightforward–even if the fix isn’t always what you’d like to hear:

The sink flange: Unscrew the bolts and check for rust or other deterioration, and replace them if you find any. Then, remove the flange, scrap off the putty holding it in place, and reapply fresh putty. Turn back on the water to test the seal.The dishwasher hose connection: First, try using a screwdriver to tighten the screws on the metal clamp connecting the hose to the disposal. If the screws don’t seem to tighten properly, consider replacing them. It’s also possible the hose itself is leaking, in which case you’ll have to replace it.The drain line connection: You may be able to fix this leak by tightening the connection between the pipe and disposal. Try un-attaching and reattaching the pipe if tightening doesn’t work. If you’re still having issues, try replacing the screws or gasket. You could also use a pipe clamp and tighten with a screwdriver.The reset button: Unfortunately, if your garbage disposal leaks from the bottom, then it’s probably simply time to remove the garbage disposal and replace it. If one internal seal is worn out, after all, then the rest are probably getting there too.


By following the directions above, you should be able to identify and fix just about any garbage disposal leak you’re dealing with. Of course, “should be able to” doesn’t necessarily mean will be able to. Sometimes unusual leaks happen. These leaks can be tough to figure out, much less fix!

Whether you have a weird leak you can’t get a handle on, or you just need to ask some questions, feel free to call Mike Diamond any time. We’ve got everything we need to handle any garbage disposal problem you can throw at us.

The post Is My Garbage Disposal Leaking? appeared first on Mike Diamond Services.

Did you miss our previous article…
https://tkoplumbingco.com/?p=376

post

How to Clean Mold in Showers

>
A white tiled shower with dark mold stains.

There are thousands of types of mold. Mold spores travel through the air around us every day. Once these spores settle, they can reproduce in 24-48 hours. All they need is a moisture and oxygen. Bathrooms and showers provide the perfect breeding ground for mold to grow.

Unlike mildew, which forms on surfaces, mold is a fungus that can penetrate porous materials. If you see black or green gunk in the corners of your tiles and caulking or dark spots along walls, you probably have mold.

Molds carry health risks, especially for people with acute illnesses and compromised immunity. We’ll show you how to clean mold in showers to avoid these health risks. We’ll also give to tips for preventing mold in your bathroom and your home.

What Kind of Mold is in Your Bathroom?

Diagram of different types of mold.

Molds come in three different classifications:

Allergenic:  Causes an allergic reaction or asthma-like symptoms.Pathogenic: Harmful to people with acute illness or compromised immunity.Toxigenic: Dangerous or even deadly to everyone.

Unfortunately, it can be difficult to tell different kinds of mold apart. Black mold in showers could be Stachybotrys – the most toxic “black mold” – but it could be Alternaria or Aspergillus, two common household molds.

You can have your mold tested to determine what variety it is, but the CDC recommends treating all molds as harmful. It’s best to remove and clean any mold as quickly as possible.

8 Steps to a Mold-Free Shower

To fully get rid of black mold in your shower, orange mold in your shower and mold in shower grout, use a cleanser specifically designed for mold. While bleach is often touted as the best way to get rid of mold, it doesn’t fully address the problem. Bleach is good at removing mold stains and surface mold, but it doesn’t kill fungus that has soaked in.

If you prefer not to use a commercial detergent, you can create a 1:1 solution of hydrogen peroxide and water or white vinegar and water to kill deep-rooted mold.

A woman scrubs mold from shower grout with a toothbrush.

You will need:

CleanerSpray bottleRubber glovesCleaning clothScrub brush with stiff bristlesToilet paper or paper towelBleachVinegar

To perform a thorough cleaning, follow these steps:

Spray down all affected areas of shower with detergent or cleaning solution.Let soak for 20 minutes-hour.Apply rolled paper towel or TP in cracks and along tub rim to keep cleanser soaking against mold.Scrub vigorously with brush.Rinse and wipe with clean water.Scrub any stained areas with bleach.Rinse and wipe.Spray with white vinegar and let dry.

The final step is a preventative. White vinegar inhibits mold from growing and will reduce the chance of mold returning to your shower.

If you have significant mold growth or are worried that you have toxic mold, consult a professional remediator. Don’t take on large mold projects yourself.

Never paint or caulk over moldy walls/ cracks. You won’t stop the mold from reproducing or being a health risk. Replace old moldy caulk with new, mold-resistant caulking.

 Remove Mold from Shower Head

A moldy shower head.

Shower heads inevitably build up with mineral deposits and sometimes mold. If you’re wondering how to clean all those small nozzle holes, here’s a trick.

Put a 1:1 solution of white vinegar and water in a plastic bag. Place the bag over your shower head and seal it shut with rubber bands. Let your shower soak in the solution overnight. The next morning your shower head will be like-new and, best of all, mold free.

How to Prevent mold in Showers and Bathrooms

The best way to get rid of mold is to prevent it from being able to form. Follow these practices to limit mold from growing in your shower.

Turn on an exhaust fan or open a window when showering.Keep humidifiers at 50% or less.Clean your bathroom often with mold-killing products.Fix leaks, drips and other sources of moisture.Change air filters frequently.Don’t leave wet towels or laundry on floor.Spray vinegar on shower walls regularly to prevent mold growth.

By keeping a dry, clean home, you significantly limit mold’s ability to grow. Regular bathroom cleaning and maintenance means no ugly dark stains on tile or grout.

Plumbing Issues Related to Bathroom Mold

If you have mold in your bathroom from leaky pipes, bad drains or drippy faucets, Mike Diamond can help. If you’re in Los Angeles or the surrounding area, schedule service with a certified plumber to evaluate and repair your plumbing issue today.

The post How to Clean Mold in Showers appeared first on Mike Diamond Services.

Did you miss our previous article…
https://tkoplumbingco.com/?p=370