post

What to Do if Your Tap Has Rusty Water

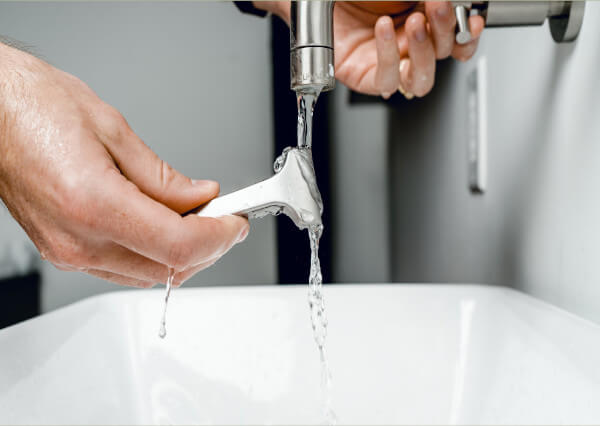
You just woke up and you’re about to brush your teeth. You stick your brush under the tap, turn the water on, and… a stream of brown, cloudy mush drizzles out.  Rust colored water isn’t normally harmful but it can be disturbing.  The causes can range from corroded pipes to mineral build up to utility company operations.

Seeing your home’s tap water turn rusty is a traumatizing experience, especially if you don’t know why it’s happening. That’s why we put together this primer to explain why your water is rusty looking. If the reason for your home water discoloration is rusty pipes, we’ll explain what you can do about it. We want all Los Angeles residents to have clean, safe drinking water in their homes.

iron, one of the elements that makes water look rusty

What Makes Water Brown?

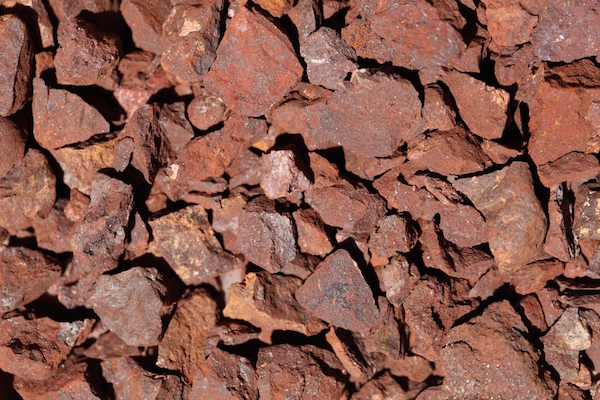
Tap water looks rusty brown, yellowish, or reddish when it contains an excess of sediment or minerals.

The most common discoloring minerals present in water are iron and manganese. Tiny metallic deposits of these minerals can get into the water stream via several different sources – natural or manmade. These minerals can also be responsible for any unpleasant tastes or smells your water might have.

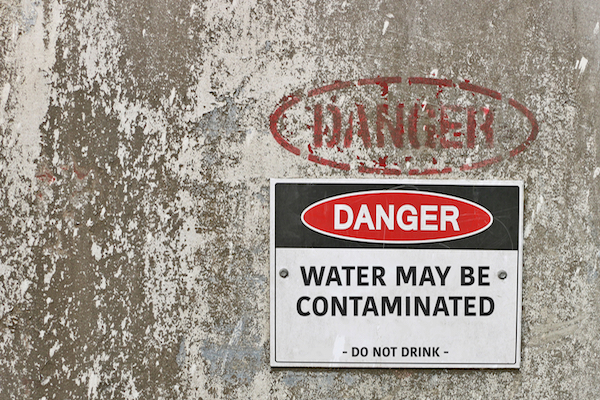
Is Rusty Water Dangerous?

It depends on the particular minerals in your water, but probably not. The EPA regulates the treatment of drinking water contaminants according to primary and secondary standards. Dangerous contaminants like lead and arsenic are covered by the primary regulations. If these contaminants exceed a maximum contaminant level in a water supply, it (usually) isn’t supplied to the public.

The secondary EPA regulations cover contaminants like iron and manganese. These contaminants aren’t dangerous to health but taste, smell, or look bad and could stain clothing or cause skin rashes. Public water systems are compelled to test for primary contaminants on a regular basis but testing for secondary contaminants is unfortunately voluntary. Rusty water might be gross and inconvenient, but it’s not actually dangerous to drink or bathe in.

Rusty pipes

Why Is My Water Brown?

Any of the following symptoms could cause brown water from the faucets in your home. Diagnose your water problem using these three common scenarios:

If all your hot and cold water suddenly goes brown:

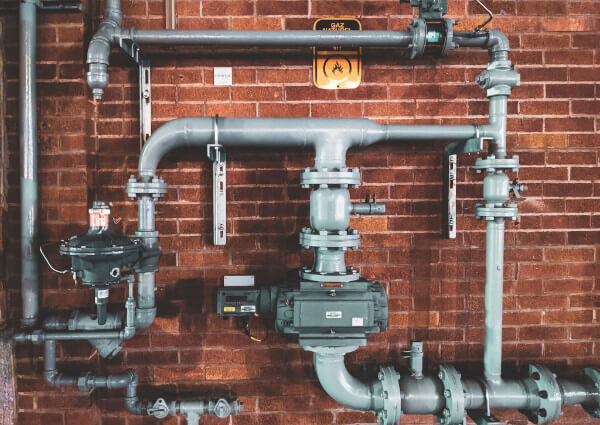
It may be the result of a nearby break in a city-operated water main or fire hydrant. Much of America’s plumbing infrastructure is outdated, so water main breaks that release sediment into the water supply happen frequently.

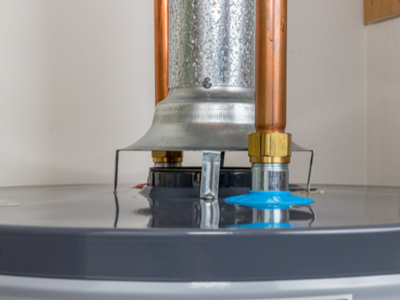
It’s also possible that either your water heater or your water supply pipes have become rusty or corroded, and you’re just now starting to see the effects.

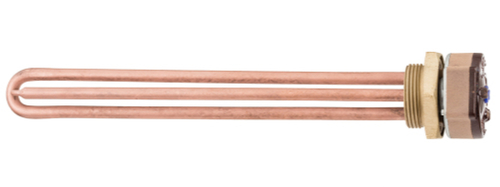
If only your hot water is discolored:

Sediment or rust may have built up in your water heater’s tank.

If you get brown water from your cold tap and only certain faucets:

The problem is probably with a particular water supply pipe.

fixing rusty pipes

How To Fix Reddish Brown Water

Now that you have an idea of what caused your rusty water discoloration in the first place, you know where to start:

If all your hot and cold water suddenly goes brown:

Call your water supply company. Chances are, something happened to a water main or a nearby fire hydrant. It’s also possible that the city is conducting maintenance on the pipe system, and they inadvertently stirred up some sediment. They should be able to tell you when your water will clear up again and what they’re doing to fix the problem.

Once the utility work is done, run your taps for a few minutes until you no longer see orange water coming out of your faucets. Brown water in toilets should disappear after a couple of flushes refresh the water supply.

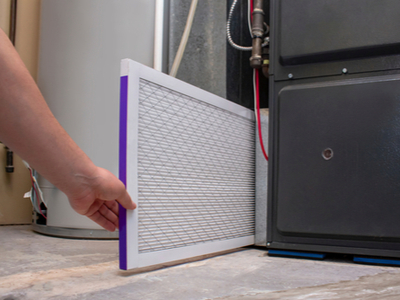
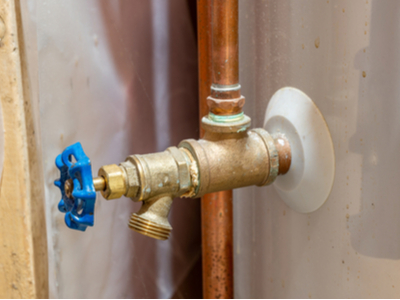
If all your hot water is discolored:

Try draining and flushing your water heater’s tank. Rusty hot water is often the result of sediment that’s built up over time. It’s a good idea to drain and flush your tank twice a year. Sediment buildup isn’t just bad for your water; it’s one of the most common causes of water heater leaks.

If you flush the tank or have a newer water heater and your hot water is still off-colored, you may have a more significant problem. Call a professional plumber to diagnose the issue. Too much sediment buildup could permanently damage your water heater, or (in rare and extreme circumstances) cause it to explode!

If your cold water is only discolored when it comes out of a few faucets:

Start by running those faucets at full pressure for about several minutes or until the water clears completely. Sometimes, a small amount of rust may dislodge from the inner walls of a pipe and enter the water supply. If the problem is that minor, simply running the water should clean out the rust and clear the water again.

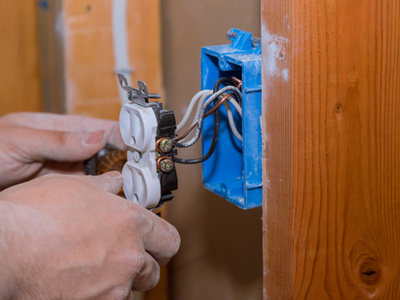
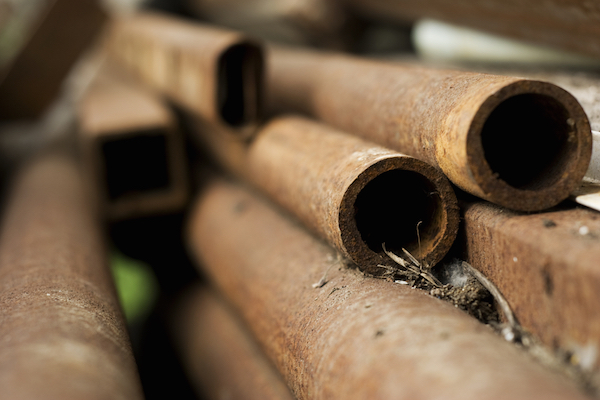
If your water still looks rusty after running it, however, or if the problem returns shortly after you flush the rust, it may be because your pipes have corroded. When too much corrosion or rust builds up on the pipe walls of your home’s water supply pipes, then minerals will leach into your water constantly, and you will continue to have brown water from your cold tap.

If you have a corroded or rusted pipe, you should have it deep cleaned or replaced ASAP, before it causes even more serious problems.  Corroded pipes can lead to clogs and possible leaks or breaks in your water line.

Get Rid of Brown Rusty Water in Your Home

If you’ve tried everything and remain frustrated by rusty water coming from your tap, remember that Mike Diamond has your back. Give us a call, and we’ll diagnose why your faucets are spewing out that ugly brown stuff and make sure your pipes are transporting clean, clear water to you and your family.

Nobody in Los Angeles should have to shower in–much less drink!–rusty water. We’ll make sure you never have to.

The post What to Do if Your Tap Has Rusty Water appeared first on Mike Diamond Services.

Did you miss our previous article…
https://tkoplumbingco.com/?p=363

post

Gas Furnace Maintenance Tips to Keep the Heat Coming

>

Even if winters don’t exactly get Arctic-cold in Southern California, it doesn’t mean that you want your gas furnace to go out. The best way to avoid potential trouble on those chilly evenings is with regular furnace maintenance. Keeping your furnace clean and in good working order means it’s always ready for that unexpected cold front.

To keep your gas furnace working when you need it, we recommend an annual furnace checkup. During the rest of the winter, follow these seven furnace maintenance tips to keep the heat coming:

Work under safe conditions

Before you do anything, make sure you’re working safely. Gas can be dangerous if you don’t handle it correctly. Before you begin any serious furnace maintenance, make sure you turn everything off. If you’re not 100% sure what you need to turn off to get the work done, trip the main circuit breaker to verify your safety during the maintenance process.

Finally, if you smell gas, don’t try to shut anything off or turn it on–instead, leave the premises immediately. Have a professional flush the gas from the house and fix the leak before you do any more work.

A Los Angeles homeowner easily replaces their furnace filter
How to Check Your Furnace Filter

A gas furnace’s filter prevents dirt from entering the unit and building up. Build up can lead to malfunctions or even fires. A filter also keeps the warm air blown into your home clean. Check your filter at least once every other month. This holds true for summer as well as you run your air conditioner.

Your filter is simply a cardboard rectangle with a mesh covering. It easily slides in and out of its designated slot, usually at the bottom of your furnace. You can find most replacement filters at your local hardware or home improvement store.

Test your thermostat

If the temperature setting on your thermostat doesn’t match the actual temperature, you may have one of two furnace-related problems:

The thermostat itself has stopped working.There’s a disconnect between the wall unit and the furnace.

Either way, if this happens frequently, you’ll want to repair or upgrade your thermostat. A new, programmable energy efficient thermostat isn’t expensive and usually pays for itself in energy cost savings.

Clean the blower

While checking the filtration system, also check the blower. The blower is further inside, and you should be able to see it when you change the air filter. It’s a circular intake with a wheel-like fan.

Wipe the blower down with a damp cloth each time you change the filter. Cleaning the blower prevents dust or dirt that may have escaped through the filter from getting further inside the furnace.

Cleaning exterior vents is part of annual furnace maintenance.
Regularly check and clean your vents

All gas furnaces have a venting system that prevents unsafe heat build-up. Just like with anything else that never moves, dust builds up both on and within furnace vent systems. Clean them with a scrubbing brush, vacuum cleaner, and damp cloth to ensure their continued effectiveness.

Inspect your flue pipe for cracks or holes where dangerous carbon monoxide could leak.

Inspect the fan

This maintenance is best left to a professional. It isn’t as easy to get to the fan within the furnace as it is to get to everything else. Getting pre-winter furnace maintenance is recommended to keep up with part changes and cleaning needs. Don’t let small problems become big.

Clean Your Air Ducts

Vacuum them out or have a professional do it. Dust, pet dander and debris that builds up inside your ducts eventually gets blown all over your home. Clean ducts work better and mean cleaner air.

 Annual Furnace Maintenance in Los Angeles

Keeping your furnace clean is the easiest way to extend its life and keep it from breaking down. Hopefully this furnace maintenance checklist helps you get started.

Not everyone is up to this level of DIY maintenance. If you want a certified technician to perform your gas furnace cleaning, the trained professionals at Mike Diamond are ready and waiting to help you out.

The post Gas Furnace Maintenance Tips to Keep the Heat Coming appeared first on Mike Diamond Services.

Did you miss our previous article…
https://tkoplumbingco.com/?p=357

post

The Anatomy of Your Home’s Water Heater

>

Traditional water heaters look like large metal cylinders and are usually located in your basement or closet. While tankless water heaters are becoming more popular, this blog will focus on the workings of the more common traditional tank water heater.

Your water heater performs an important task that you probably don’t often think about. It supplies warm or hot water to all parts of your home for hand washing, showers, dishes and more. How is it that you have hot water at the turn of a knob? We’ll cover the water heater parts that make it happen and what to do if your hot water heater is not working the way it should.

Water Heater Anatomy

The two most common types of water heaters in US homes are the traditional electric and gas models. These two varieties have many of the same elements with the primary difference being their power sources. Their major components include:

Water tank. This stores the hot water until it’s needed at a faucet or appliance. Tanks come in different sizes depending on the amount of hot water needed. Most tanks are lined with a thin layer of glass. Transport your new water tank carefully to avoid cracking or breaking it.

Dip tube. This is the cold-water pipe that supplies new water to the water heater. As hot water exits the heater at the top, the dip tube replenishes the water supply at the bottom.

Hot water outlet. This is where hot water leaves the tank to travel through your home’s plumbing.

The drain valve on a home water heater.

Thermostat. Like the thermostat for your home, your water heater’s thermostat regulates the temperature of the water. When the thermostat senses cold water at the bottom of the tank, it activates the burner or heating element to warm the water.

Drain valve. At the bottom of your water heater is a hose connection and valve. Use this to empty your tank once a year to prevent sediment build up inside the tank. Consult a professional if you’re unsure how to drain your water heater.

TPR valve. Water heaters have a temperature pressure relief valve near the top. This valve will open if the tank experiences excessive pressure or heat within. It prevents your water heater from exploding.

Internal anode rod. This rod attaches at the top of your tank. Like a magnet, it attracts the corrosive elements in your water so that they don’t eat away at the tank walls. Depending how corrosive your water is, you may need to replace your anode rod every few years.

Electric vs Gas Water Heater

The way in which your heater heats water depends on whether it is powered by electricity or natural gas. Below we explain the differences.

Electric water heaters

An electric heating element from an electric water heater.

In addition to the parts above, electric water heaters also contain:

Heating element. This is a metal loop inside the tank. It’s powered by an electric resister and controlled by the thermostat. When electricity travels through it, it becomes hot and heats the water.

Electric water heaters have a thermostat mounted flush with the outside of an internal tank. This thermostat constantly senses the internal temperature of the tank. If it senses the temperature getting too low, it activates the heating element inside the tank. The tank’s internal heating element heats up the water stored in the tank. The heating works the same way an electric range heats up a pot of water. Once the water reaches the set temperature, the thermostat cuts off power to the heating element.

Gas water heaters

Additional parts that make up a gas water heater include:

The flue vent on top of a gas water heater.

Burner. The burner sits at the bottom of a gas heater. When the water inside the tank needs to be heated, a flame ignites from a pilot light. It’s essentially like heating a water kettle on a gas stove.

Vent Flue. This is a hollow “chimney” through the center of the tank. It vents the exhaust from the burner to the outside.

Thermocouple. This is a small rod beneath the burner. It senses if the pilot light is on and sends a signal to the burner to activate. If the pilot light goes out, the water heater thermocouple prevents the gas valve from opening and leaking gas into your home.

Gas water heaters have a thermostat just like electric ones do. The thermostats in gas water heaters contain a mercury sensor in the tip alongside a thermocouple. The thermocouple monitors the pilot light and the mercury sensor monitors the internal water temperature.

When the temperature inside the tank gets too low, the thermostat sends a signal to the gas control valve. This valve checks in with the thermocouple to make sure the pilot light is on. If it is, the valve opens and allows gas into a burner, igniting a flame. This flame heats the water. Once the water in the tank heats to the preferred temperature, the gas control valve closes again. The exhaust from the burner travels through the flue vent and safely outside.

How to choose the right water heater for your home?

Start by checking out our helpful guide! We’ll cover everything you need to consider when choosing a new water heater. That includes the right type, fuel, efficiency, and tank size to fit your needs.

How do I best maintain my water heater?

Make sure your drain the tank regularly to clear out any sediment build-up. If you don’t, sediment buildup in the tank will make the heater far less efficient.Set the water heater thermostat’s temperature to 120 degrees Fahrenheit or less. If you ever leave home for an extended period of time, consider turning the temperature down before you leave.Always keep an eye out for pooling water around the base of the heater’s tank. Catching small leaks before they become big ones will help save you a lot of money and trouble.

Los Angeles Water Heater Repair and Installation

If your water heater is leaking or you’re interested in upgrading your to a more energy efficient water heater, give the team at Mike Diamond a call. Our experts can help you choose the right make, model, and size for your home. Not only that, but we can install as quickly and efficiently as possible.

The post The Anatomy of Your Home’s Water Heater appeared first on Mike Diamond Services.

Did you miss our previous article…
https://tkoplumbingco.com/?p=271

post

Where Does Los Angeles Get Its Electricity?

Have you ever wondered where your home’s electricity comes from? It’s a bigger question than you might realize! Every one of LA’s electricity-using structures connects to our gigantic, state-spanning, billion-dollar power system. Your humble home is one end of a story spanning hundreds of miles and involving thousands of people.

The Electrical supply Los Angeles uses every day is nothing short of an engineering miracle. We’ll give you the shocking truth about where the power that runs your coffee machine every morning comes from. Enjoy Mike Diamond’s guide to the Los Angeles electrical grid.

Who Makes Los Angeles’ Power?

The Los Angeles Department of Water and Power (LADWP) supplies all the power LA uses every day. The LADWP is the nation’s largest municipal utility. 9400 employees help manage an electrical system capable of generating over 7,880 megawatts of power. Overall, the LADWP power system supplies an average of over 26 million megawatt-hours of electricity to LA every year.

The LADWP was established in 1902 to deliver water to LA. In 1916, it also began distributing electricity. The LADWP is managed by five-member Board of Water and Power Commissioners selected by the mayor of LA and confirmed by City Council.

What Generates All of L.A.’s Power?

According to the California Energy Commission’s 2019 report, California generates its electricity via these means:

0.12% coal16.53% large hydro42.97% natural gas8.06% nuclear0.02% oil0.20% Petroleum/waste heat2.92% biomass5.46% geothermal2.67% small hydro14.22% solar6.82% wind

California is a national leader in renewable energy production. Every part of California–including LA–is quickly scaling up how much renewable energy it uses. The state hopes to get 50% of its electric power from renewable sources by 2030.

To accomplish this goal, the LADWP is in the process of implementing the Power Strategic Long-Term Resource Plan (SLTRP). The SLTRP is a 20-year plan for aligning LA with Senate Bill 350 and LA’s 100% clean energy initiative. As part of this plan, LA will eliminate coal as a power source, decrease natural gas use, incorporate more renewable energy sources, and more.

LA power generation and transimission

Where The Los Angeles Electric Company Gets Its Power

The LADWP gets the power it supplies to LA from many sources, both inside and outside of California. You may be surprised to know that your electricity comes from Arizona, Utah, Wyoming and Oregon. These sources include:

Hydro plantsNatural gas power generating stationsLandfill biogas converting stationsHydroelectric damsSolar plantsWind plantsGeothermal plantsNuclear power generating stations

All of these power sources are connected to LA via a massive transmission and distribution infrastructure. Moving and distributing LA’s power requires:

3,507 miles of overhead transmission circuits (across five states)124 miles of underground transmission circuits15,452 transmission towers6,752 miles of overhead distribution lines3,626 miles of underground distribution lines160 distributing stations21 receiving stations128,693 distribution transformersand more

Overall, 15,000 miles of power lines and cables are required to transport and distribute LA’s power!

How Electricity Gets to Your Los Angeles Home

This infographic explains the high-voltage journey electrical power makes to get to your home.  We break down the steps in further detail beneath the graphic.


How Does LAs Power Get to You?

‌Phase 1: Transmission

1. Plant to “Step Up” Substation

A Los Angeles Power substation.

Each of LA’s many power generators connects to a transmission substation (sometimes called a power plant).

Transmission substations “step up” the voltage to prepare the power to travel long distances through the transmission grid. Whenever an electrical current is conducted through anything (like transmission lines), it loses some power to electrical resistance. The higher the voltage of the electricity in the transmission line, however, the less electricity resistance wastes. By “supercharging” the generated power’s voltage, transmission substations make sure it gets to you without losing its effectiveness.

2. First Substation to Transmission Network

After converting low voltage power to very high voltage power, substations send electricity into transmission circuits. These circuits run from the transmission substation near the plant all the way to local distribution substations in your city. A single transmission line can successfully conduct electricity for up to 300 miles.

There are two types of transmission circuits:

Overhead circuits transmit electricity over long distances. They’re supported by the giant steel transmission towers you’re probably familiar with.

Underground circuits are used in high-density, urban areas where there’s no room for transmission towers. LA uses 124 miles of underground circuits.

Phase 2: Distribution

3. Transmission Network to “Step Down” Distribution Substation

Los Angeles' transmission network carries electricity to you,

Your power has already traveled hundreds of miles via the transmission lines to reach your area. Before it can enter the distribution grid, however, it must pass through another substation. Instead of charging up the electricity with more voltage, these transformers remove voltage to make it safe for distribution.

After passing through the transformer, electrical power enters a “distribution bus.” The distribution bus splits the power off into multiple different directions. LA uses 160 distributing substations to transfer its electricity into distribution.

4. Second Substation to Distribution Network

By now, your power is almost to you. After passing through the “step down” transformer and bus at the substation, power enters the local distribution network.

LA’s distribution networks is, as you can probably imagine, massive. The city uses 6,752 miles of overhead and 3,626 miles of underground distribution lines. These lines crisscross all over the city to supply power to every single connected structure.

5. Distribution Network to You!

A Los Angeles power transformer.

Once the distribution line reaches your immediate area, it connects to a distribution transformer -either supported on overhead poles or buried underground.

Distribution transformers “step down” the amount of electricity running through power lines one more time. This process brings the electricity’s’ voltage down to around 240 volts, to make it safe for residential use.

This stepped down electricity travels via your home’s service wire from the distribution transformer all the way to your home’s meter box. The meter box records how much electricity is entering your home and the voltage of that electricity. Electricity passes through the meter box and into your circuit breaker, where it’s distributed throughout your home via your electrical panel.

‌Electrical Contractors in Los Angeles

By the time electricity reaches you, it’s had quite the journey. If you have questions about your home’s power supply or are concerned about the amount of electricity powering your home, fill out our quick and easy service form. One of Mike Diamond’s licensed technicians will be happy to make sure your family gets the power it needs to live comfortably.

The post Where Does Los Angeles Get Its Electricity? appeared first on Mike Diamond Services.

post

How Can I Fix a Loose Electrical Outlet?

>

Since we use electrical outlets nonstop every day, it’s easy to forget how dangerous they can be. All that separates you from the high-voltage electrical currents flowing through your wires is a hard plastic shell. If your outlets ever seem loose, it’s important to perform outlet repair right away. Loose outlets could expose you to direct voltage, sparks, or other electrical hazards. 

Outlets can loosen in two different ways:

The whole outlet face wobbles.The receptacles are so loose that plug falls out of the outlet.

These problems occur for different reasons and require different fixes. Luckily, we can teach you how to fix an electrical outlet in either scenario. Here’s how your outlet got loose, why it’s a problem, and how to fix it. 

Why is my outlet loose?

Electrical outlets are mounted inside of an electrical box within your wall. Electrical boxes that are too far back aren’t secure enough, which affects the stability of the entire fixture. Outlets attached to these boxes will eventually loosen.

This instability could bump or jostle wires loose, creating even more major problems. Loose, damaged, or disconnected wires could shock you or spark, leading to fires and other electrical hazards.

How do I fix an electrical outlet that wobbles?

Fixing a loose outlet requires outlet shims, a wire tester, and a screwdriver. Once you’ve collected these tools, take each of the following steps:

Time needed: 10 minutes.

Turn off power to the outlet.Use the circuit breaker in your electric panel specific to that room.

Test outlet.Insert your wire tester and be certain the power is off before you proceed.

Remove outlet.Unscrew the outlet cover and outlet screws. Remove the outlet from the box so that it hangs freely.

Add outlet shims.Place outlet shims onto the outlet screws. These shims will compensate for any gap between the screws and the recessed box. You may need more than one shim per screw depending how far back your box is.

Replace and test.Replace the outlet back in the housing box and tighten the screws. If it still seems loose, add more shims. Reinstall the outlet cover, restore power and use your newly secure outlet!

How to fix a plug that falls out.

A loose plug slips out of an electrical outlet.

If plugs constantly fall out of your outlet, the problem is the outlet’s receptacle. An outlet’s receptacle is the two narrow slots your plugs go into. Contact points and other parts of your outlet wear out over time. Old, worn-out outlets and receptacles could arc, spark, or start fires. 

If your outlet receptacle is worn out, the best way to fix it is to simply replace it. New outlets are inexpensive and well-worth the peace of mind.

Replacing an outlet requires rewiring it into the electrical box. It’s crucial that you attach each wire to its appropriate connection to avoid shorts. If your electrical plugs keep falling out and you’re not comfortable with electrical outlet repair, we recommend calling a professional to replace it. An electrician can replace an outlet quickly and easily to ensure your home is safely powered.


Electrical Outlet Repair for Los Angeles

These are fairly simple electrical fixes, but even the simplest electrical fixes pose some risk. If you have even the slightest doubt in your ability to make an electrical fix safely, don’t do it.

Instead, call an accredited, professional electrician like the ones employed at Mike Diamond. Our technicians will be able to fix your loose outlets or any other electrical problems you face quickly, safely, and correctly.

The post How Can I Fix a Loose Electrical Outlet? appeared first on Mike Diamond Services.

Did you miss our previous article…
https://tkoplumbingco.com/?p=209

post

Clogged, Blocked, or Slow Moving Drains? Here’s What to Do


Getting a great plumbing system requires you to be as proactive as possible. While it’s common for plumbing problems to sneak up on you and cause interupptions, we don’t want this to happen to you repeatedly. This is why we’d like you to take a step back today and understand what’s going on with your plumbing system when this happens.

We specialize in plumbing in Orlando, FL. If you’d like to improve your plumbing, then we’re the ones who can make this happen for you. Today, we’re going to discuss what might be going on in your home if you have clogs, cracks, or slow-moving drains and we’ll explain how to fix these issues.

What’s Going On?

Let’s go through the problems that you might be experiencing and their backstory.

Clogs

Food debris, soap scum, fats, oils, grease, and more all add up. These are the things that create the clogs that cause your sink to bubble.

Blocks

Are you wondering how blocks are different than clogs? Blocks are what we classify as outside problems that have worked their way into your system. These are the tree branches and other things that can interfere with your home’s plumbing system.

Slow Moving Drains

Slow-moving drains are the warning signs that come before clogs. Don’t ignore this issue. It’s your sign to get a professional by your side. 

How Did It Happen?

Okay, now let’s get into how this might have happened. This is the backtracking that we alluded to in the introduction. Figuring out how this happened is the best way to prevent it from ever happening again. Here are a few reasons why you might have issues:

FOG: FOG is an acronym that stands for fat, oil, or grease. If you’re letting these substances slide down the drain, it might be fine at first, but it’s eventually going to settle and become an issue for your home. These substances are magnets for clogs and it’s going to create a snowball effect. No Drain Strainer: The best (and simplest) thing you can do for your plumbing is run out to your local hardware store and get yourself a drain strainer. We’re all fallible. If you make a mistake from time to time, your drain strainer will have your back.Lack of Proper Care or Maintenance: You should be maintaining your home’s plumbing system just like any other home system. Make sure that you have a professional out to your home when you need maintenance or any other plumbing service. 

What Should You Do?

Honestly speaking, the better way to phrase this might be, “what not to do” because the one thing you should do is schedule an appointment with a professional. Your plumbing system is complex and requires professional care. Don’t let someone who doesn’t have years of experience, training, and licensure touch your plumbing system. 

If you’re tempted by the in-store and over-the-counter drain cleaners, this is your warning sign not to go through with what you’re considering. You need professional care. Amateur plumbing efforts are always bad news. We want to help you move around this. 

Contact Modern Plumbing Industries, Inc. today to schedule an appointment with our professionals. 

Did you miss our previous article…
https://tkoplumbingco.com/?p=177

post

How to Fix a Loose Toilet Handle

>
Wiggling toilet handle

A loose or wiggly toilet handle can be annoying. A toilet handle not flushing at all is even worse.

Luckily, a loose toilet handle is a minor toilet problem and one that’s usually easy to fix. Here’s how you can fix a broken toilet handle, either by tightening or replacing it.

How to Tighten a Toilet Handle

Close the toilet seat cover.Keep parts or tools from falling in.

Remove the toilet tank cover.Use two hands as it may be heavy and set it on a flat surface where it won’t fall or crack.

Shut off the water supply to your toilet.The shut-off valve should be located near the base towards the back of your toilet.

Press the toilet tank lever to empty the water from the tank.This allows you easier access to the inside of the handle.

Find the toilet handle nut.It will be on the inside of the porcelain wall adjacent to the handle. This is probably the source of your loose toilet handle.

Tighten the toilet handle nut.Use an adjustable wrench or pliers clockwise to ensure the nut fits snuggly. Do not over-tighten – it could cause your porcelain tank to crack.

Depress the toilet handle to test.If it feels and sounds better, well done. If not, read on to learn how to replace a toilet handle.

Turn water supply back on.Turn the shut-off valve counter clockwise to open. Your tank will refill.

How to Replace a Toilet Handle

Determine what hardware you’ll need for your toilet lever replacement. Most hardware stores sell universal toilet handles, but you may need a specific variety. Look up your existing brand name, model, and make to see what type of flush handle replacement will work.Close the seat, remove the tank lid, turn off the water and empty the tank. (See 1-4 above.)Look inside the tank and unclasp the chain clip that’s attached to the lever. This is a small chain hooked onto the inside portion of your toilet handle.Remove the mounting nut. This is the same nut you would have tightened in the first walkthrough up above. Use a wrench or pliers to unscrew the nut (counter-clockwise) and take it off. Pull the old handle out. Once the nut and chain holding it in place are removed, you can pull it out by hand. You might have to angle it a bit to get it out, but that’s normal.Unscrew the mounting nut on the new handle nut, but don’t lose it. The nut may be metal or plastic.Insert the new lever into the tank to match the position of old one. You’ll know it’s in right when the handle is flush with the side of the tank. Secure the handle from inside the tank with the new mounting nut.
A person tests their toilet lever replacement.
Attach the chain to one of the holes in the lever. There are usually a few to choose from. You want around one inch of slack in the chain so that it flushes properly. Try a few of the different holes in the lever until you find the right length.Turn the water back on and test it out. It should flush easily, without rattling.

Congratulations! You now know how to install a toilet handle.

By following these steps, you have hopefully fixed or replaced your loose toilet handle.

If your toilet handle broke or keeps coming loose, get in touch with Mike Diamond. We’ll diagnose the problem and make sure your toilet is working properly. No matter what your toilet question, Mike Diamond – your trusted LA plumber – has the answer.

The post How to Fix a Loose Toilet Handle appeared first on Mike Diamond Services.

Did you miss our previous article…
https://tkoplumbingco.com/?p=145

post

Do You Need a Water Treatment System?

dripping-faucet
The quality of your water affects your life. If you’re not paying attention to this, then it’s time for you to take better control of it. High-quality water means that you have a high-quality home. We’re going to make sure that you notice all the signs that your home’s water is subpar in any way. Then, we can help you figure out what water treatment system is right for you.

We specialize in water treatment systems in Orlando, FL. We’re going to help you find the water treatment system that’s right for you. We’re licensed, insured, and we’re experts in everything that we do.

Do You Need a Water Treatment System?

So let’s start from the top—do you need a water treatment system for your home?

We know that it’s not always so obvious. Sometimes, you can look at your water and tell that something has gone wrong. Other times, you need some other pointers. Here are a few:

Your water is cloudy Your water tastes badYour water stains your surfaces, clothes, or it makes your clothing or fabrics stuffYour water has an oily filmYour water has a sandy textureYour water has an odorYou’re noticing your stomach hurting after you drink your tap water

Don’t ignore any of these signs. Instead, get in contact with our professionals for the work you need.

The Systems We Work With

If you’ve realized that you need a water treatment system, then you can come to us for services on the following systems:

Water Testing

You need to start at the beginning when it comes to your water treatment services. Starting at the beginning starts with water testing. This is when our professionals will come out and run tests on the water in your home to determine what’s going on with your contaminants.

Although we all live in the same general area here in Orlando, that doesn’t mean that all our contaminants are the same. What’s going on with your home could be completely different than what’s going on with your neighbor. We’ll help you figure out the key issues that need to be addressed.

Reverse Osmosis Systems

If your water is full of unwanted mineral content, then a reverse osmosis system is something that you might need to solve this issue. Reverse osmosis systems are great because they contain a special membrane to remove the contaminants and separate all the salt and minerals within them.

Sometimes, water softener systems aren’t suitable for everyone because they replace mineral content with sodium. If this isn’t suitable for you, the technology of a reverse osmosis system can help you work around this.

Water Softener Systems

Hard water is so common in Orlando, FL. Hard water is caused by high mineral content in your local water supply. The most common minerals that you might notice are calcium and magnesium. Although these aren’t harmful to your personal health, that doesn’t mean that it’s not affecting your home’s plumbing system. The best way to solve this is through the assistance of your water softener system.

Contact Modern Plumbing Industries, Inc. today to schedule an appointment with our team.

Did you miss our previous article…
https://tkoplumbingco.com/?p=130

post

How to Unclog a Bathroom Sink

>
Unclogging a bathroom sink

The best method to unclog a clogged bathroom sink may depend on what’s clogging it. You can flush soap scum clogs with vinegar and baking soda or tweeze hair. For bigger clogs, a plunger or drain snake work best.  Figuring out why your drain is clogged is the best way to figure out how to unclog it.

Below are six methods that address how to unclog a sink drain. Most of these apply to kitchen sinks and showers drains too. Roll up your sleeves and get started. If your bathroom sink is completely clogged or your sink is full of water that won’t budge, your Los Angeles plumbing experts are on hand to help.

Why is my bathroom sink clogged?

bathroom hair clogs

There are four common reasons why most people’s bathroom drains clog. Figuring out which one of these problems you have will give us a place to start. Look for:

Clumps of hair

When hair enters your sink drain it clumps together and gets stuck on the walls and tangled in the drain’s components.

Use a long tweezers or a zip-it tool to remove hair. If neither works, try disassembling the whole drain. (see “clean the p trap” below)

Soap scum

Soap scum is especially prevalent where there is hard water. It can build up in your pipes over time and foster mold and mildew.

Pour a pot of boiling water down the drain or use baking soda and vinegar to dislodge built up soap scum. If it still doesn’t budge, plunge with warm water.

Something stuck in p-trap

The p-trap is the curving pipe beneath your bathroom sink that connects to the wall pipe. It prevents harmful sewer gasses from coming up through the sink drain.

Disconnect your bathroom sink p-trap and clean out the hair and any large items that may have gotten stuck within (see details below).

Damaged pipes

Rust, corrosion, and other common pipe damage can lead to a slow drain or a clog over time.

Replace old, rusted pipes before they become bottled necked with debris. Plunge or snake them for temporary relief.

Unclogging your sink

After you’ve figured out why you have a clogged drain, try the method we recommended for your problem above. If you can’t figure out what your drain’s problem is, then try each of these methods in order.

Note: Never use chemical drain cleaners.

1. Baking soda and white vinegar

baking soda and vinegar to unclog a drain
Unscrew the drain cover and remove the sink stopper.Measure out a ½ cup of baking soda and 1 cup of white vinegar.Sprinkle the ½ cup of baking soda into the drain.Pour the cup of vinegar down the drain.Let the mixture sit in the drain for several minutes, until fizzing stops.Rinse hot water into the drain.Repeat the process up to three times.

2. Remove bathroom hair clog

Remove the stopper.Use a flashlight to look down the drain.If you can see hair, use a long-nosed tweezers to retrieve it directly.If you can’t see hair, use a zip-it tool or bend and insert a wire hanger to retrieve it.Slide the tool up and down the drain as far as it will go naturally. Don’t attempt to force it.Push the tool in at different angles. Try to move it around the drain to catch more hair.Repeat the process several times, rinsing with hot water as necessary.

3. Plunge

Plunging to unclog a bathroom sink
Use a cup plunger.Remove the stopper.Seal the sink overflow outlet with tape or a rag.Place towels or rags on the floor around the sink.Fill the sink with warm water.Use the plunger’s cup to create an airtight seal over the drain.Pump the plunger’s seal up and down several times with quick, sharp movements.Test the drain to see if you’ve cleared the clog.Repeat a few times as necessary.

4. Clean the p-trap

Put a bucket under your p-trap and wear rubber gloves.Loosen the slip nuts by hand or with a pliers as necessary.Remove the p-trap by hand and dump the water into the bucket.Remove objects and grime lodged in the trap.Clean the p-trap with a bristle brush.Put the p-trap back together and test the drain.

5. Snake

Using a plumber's snake to unclog a bathroom sink drain
Use automated drain snakes (called plumber’s snakes or plumber’s augers) if possible.Place towels or rags beneath the sink.Remove the p-trap.Remove the stopper.Thread the snake into the wall drain manually.Uncoil the snake using the handle.When you reach the clog, rotate the head up-and-down and back-and-forth.Pull the snake out and reassemble the sink components.Check the drain.

6. Dissemble the drain

Follow these directions to remove your sink drain. Replace old or corroded drains with a new one. A new drain can help your sink smell fresh again.

Bathroom sink plumbing for Los Angeles’ worst clogs

We hope you’ve learned how to fix a clogged bathroom sink. If you’ve tried everything and are still up to your elbows in water, contact the pros at Mike Diamond. Some clogs are stubborn or so far down your line that they require extra finesse. We know how to dislodge these tough clogs and get your drain flowing again.

The post How to Unclog a Bathroom Sink appeared first on Mike Diamond Services.

Did you miss our previous article…
https://tkoplumbingco.com/?p=82

post

When Was Indoor Plumbing Invented?

When was indoor plumbing invented? During the medieval times, most of the people used the septic tanks for domestic purposes. The medieval ages witnessed a huge growth in the manufacturing industries across the world. And so, the demand for better and more efficient drainage systems was also increased.

When was indoor plumbing invented

With the passage of time, the expertise of the people involved in the manufacturing industries was enhanced to a great extent. With this development, the use of the sewerage system and the pipes was improved. This process came to be known as ‘inspection plumbing’.

When it comes to plumbing, the process is not complete without the use of the pipe fittings. You may say that there are a lot of pipes and piping available out there. But they are used in a perfect way if they are perfectly connected and securely fastened with the help of the proper pipe fittings.

Pipe fittings are essential to get the best out of your plumbing work. A perfect combination of pipe fittings and plumbing tools is very much needed to make sure that your drain and/or sewerage system are functioning in the most efficient manner possible. The proper pipe fittings ensure nothing but the optimum functioning of the pipes and drains. Now, that may sound really very technical and complicated. But you will feel a lot more relaxed once you understand a bit about how the entire system works.

Let us take an example. If you have a sink on the kitchen counter and a bath tub on the back yard, both of them will require the pipe fittings that will secure them to the wall. In order to make them work smoothly, you will have to make sure that they remain vertical and parallel. In this regard, you will have to keep checking and changing them whenever necessary. If you don’t do this, it will become very difficult for you to change the pipe fittings after a while.

So, how about a plumbing system that has a number of fixtures in it? You will have to install the pipe fittings to ensure that they remain in position. That means, if there are any clamps, you will have to adjust them properly. This is also the reason why you should only buy these accessories from a reputable store. Once you make your purchase, you can easily install them yourself. You don’t have to call in a plumber just because you didn’t know how to do it.

However, if you are installing a plumbing system in your home, it is obvious that you will be more interested in learning more about the pipe fittings. But where do you find these? Believe it or not, there are many websites that deal specifically with plumbing. These companies can give you all the information you need about fittings including how to install them and when they should be changed.

The Internet has opened up a whole new world for people who want to learn more about the latest gadgets and technologies. If you are interested in learning more about plumbing, you can easily visit a website that deals with it. From there, you will be able to find information about when was indoor plumbing invented? If it’s so old that it’s considered antique, you can also search for it on the same website.

These days, you can find many plumbing equipment online that can help you maintain the drainage system and fix problems in the pipes. You can use these pipe fittings in various ways to make things easier for you. Not only will you know when was indoor plumbing invented, you can also learn what these tools can be used for.

When was plumbing invented? It might have been around hundreds of years ago, but there is still no way to tell exactly when it was created. What we do know is that it is a lot older than you might think. For example, you might have heard of aqueducts, steam pipes, gravity pipes and other plumbing systems that were invented ages ago. Think about it – these have definitely helped us in day-to-day life.

To figure out when was indoor plumbing invented, you must know more about plumbing. This means you must understand plumbing history better. For this, you can read books or do online research on the history of plumbing in detail. There are even websites that can answer any question about plumbing. It is a very interesting topic that everyone should know.