post

Fuse Box vs Circuit Breaker

A fuse box or circuit breaker is the center of your home’s electrical system. It diverts the electricity from your utility company to all parts of your home. It also provides protection from overload, short circuit or ground fault by turning off the power when wires become too hot.

Most homes use circuit breakers. You can find them in your service panel box which is usually located in the basement. If your home was built before 1960 and your electrical system hasn’t been updated, you may have a fuse box instead. While both systems essentially perform the same function, there are reasons most homes upgrade to circuit breakers.

The Difference Between a Fuse and a Circuit Breaker

Determining whether you have fuses or circuit breakers in your home is easy. Locate your service panel – that’s the metal box containing your electrical circuits – and open it up.

When you open the door, you’ll see rows of either circular plugs or rectangular switches. If you have plugs – which look like the end of a lightbulb – you’ve got fuses. If you see a column of switches, you’ve got circuit breakers.

How Fuses and Circuit Breakers Work

Circuit breakers and fuses both serve the same function: to protect your electrical system from overloading and causing a fire. The difference is how they each achieve this.

Fuses. Those little plugs you see have a filament inside of them that will melt if the circuit gets too hot. When that filament melts, electricity is no longer able to travel to that circuit until you replace the “blown” fuse. You can see the filament through the clear window at the top of the plug and identify if it’s melted or not. A cloudy window is a sign of a blown fuse.

Circuit breakers are electromagnetic on/off switches that control the current to each circuit in your home. When a circuit draws too much power and overloads, the switch receives the surge first and flips off or “trips.” Normally you can unplug whatever overloaded your circuit and simply flip the power back at the tripped circuit breaker.

The Pros and Cons of a Fuse Box vs Circuit Breakers

It’s generally agreed that an old fuse box should be replaced with circuit breakers. While fuses worked well for a time, circuit breakers are more convenient and can handle higher electrical loads more safely. These days, most families run multiple devices that require more amperage. If you are considering fuse box replacement, it’s a great time to beef up your home’s electrical capabilities.

If you have an electric fuse box and a fuse blows, you’ll need to replace it with a new one. That may mean a trip to the hardware store. It also means unplugging everything in the circuit, standing on a rubber mat and making sure you’re replacing the blown fuse with the proper type. Different fuses are rated for different amperage. If you introduce a 20-amp fuse to a 15-amp circuit, it may try to draw more power than it can handle and you risk fire.

My Circuit Breaker Keeps Tripping, Why?

Hopefully, we’ve made a strong case for upgrading from a fuse box house to a circuit breaker house. The benefits certainly outweigh the disadvantages but that’s not to say that circuit breakers have their own quirks. Sometimes a circuit keeps tripping. Here are the possible reasons why:

A worn out breaker. Normally, when a circuit in your home trips, you simply find the offending switch in your service panel, flip it all the way “off” and then all the way “on.” If you have a circuit that keeps tripping regularly, you may need to replace it. Circuits that trip a lot do wear out. Remember, circuit breakers are there to protect you. If it continues to trip, it may indicate another issue.

An Overloaded circuit. The circuit connected to that breaker may have too many outlets or fixtures plugged into it drawing power. A professional electrician can diagnose the problem and rewire or add circuits if needed so that you receive enough electricity without overloading.A Short circuit or ground fault. Other reasons a circuit keeps tripping are a short circuits or a ground faults. These are similar issues where moisture or loose wires create a hazardous electrical connection. A mouse inside the wall may have chewed your neutral wire allowing it to come in direct contact with your hot wire. Or an appliance may have gotten wet allowing the hotwire and the ground to connect via moisture. You can test for these by unplugging everything in the circuit, flipping it back on and reintroducing items one at a time. If you plug an item in and the circuit trips again, you’ve most likely identified the problem.

While it’s possible to diagnose these electrical problems on your own and even replace your circuit breaker yourself, electrical work is dangerous. Having a trusted professional perform the work ensures that it gets done safely and properly.

Get Expert Advice on Fuse Boxes, Circuit Breakers and More

If you live in the Los Angeles metro area and you have outdated fuses, circuits that continually trip or want to know how you can upgrade the electrical in your home, give us a call. You can also contact us online to schedule your service.

The post Fuse Box vs Circuit Breaker appeared first on Mike Diamond Services.

Did you miss our previous article…
https://tkoplumbingco.com/?p=402

post

What You Should Know About Pinhole Leak in Copper Pipe

>
Pinhole leak in copper pipe

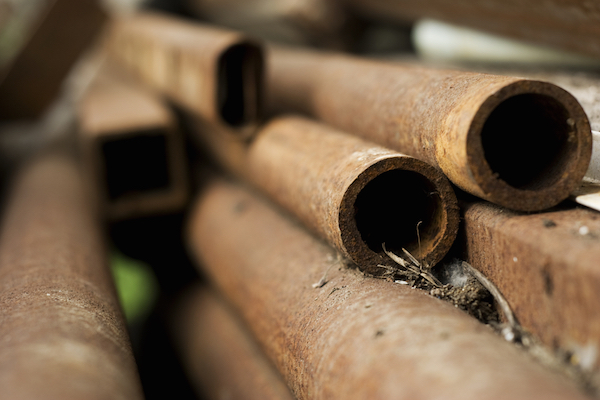
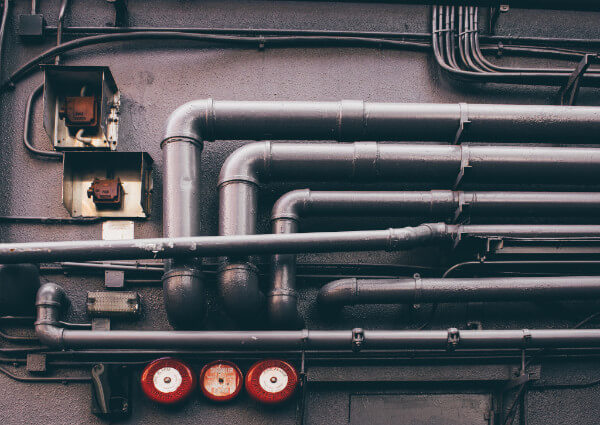
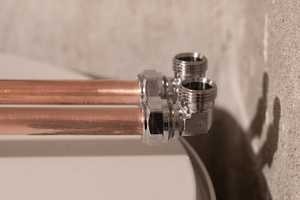
Modern copper pipes should last for 20 years or more. Unfortunately, that doesn’t always happen, thanks to a particularly pernicious plumbing problem known as pinhole leaking. Pinhole leaks only occur in copper pipe. Under the right (worst) conditions, copper pipe may develop pinhole leaks within only two years of installation.

Pinhole leak in copper pipe is a common problem all over the US. Your copper pipes spring a pinhole leak when variations in your water’s ph (acid) value wear away at the inside pipe’s natural defenses against corrosion. If you use copper pipes (and, frankly, you should), you should know what a pinhole leak is and how to prevent it. Here’s where to start:

What is a pinhole leak?

The State of Maryland Task Force to Study Pinhole Leaks in Copper Plumbing defines pinhole leaks as, “the perforation of copper tube, pipe or fittings used for domestic water distribution as the result of pitting corrosion initiated on the interior/waterside surface with the subsequent leakage of water.”

Pinhole leaks are generally very small (often less than ⅛” wide) and shaped like pinholes, hence the name. A pinhole leak itself represents the final “burst through” of a worsening corrosion problem on the interior of a copper pipe. In other words, pinhole leaks are not only a problem in and of themselves; they also represent the manifestation of long-term corrosion damage.

How does a pinhole leak in copper pipe occur?

Copper pipe joints made of a different kind of metal

As the Maryland Task Force notes above, pinhole leaks are caused by “pitting corrosion.” The Association for Materials Protection and Performance defines pitting corrosion as “is a localized form of corrosion by which cavities or ‘holes’ are produced in the material.“ Pitting corrosion only affects a very small portion of a copper pipe, eventually wearing away material more and more until it falls in on itself as a “pit” or “hole” – which, in turn, becomes a pinhole leak.

According to the Task Force’s research, pitting corrosion occurs for one of three reasons:

Chemical or mechanical damage to the protective oxide film that coats copper pipe,Localized damage to or poor application of protective coating, orThe presence of non-uniformities in the metal structure of the component, e.g. nonmetallic inclusions.

Any of these three inciting conditions could cause your pinhole leak in copper pipe in the following ways:

Chemical damage

This is the most likely cause of your pinhole leak in copper pipe. Your home water’s ph value has little to no bearing on your water’s quality or safety, but it can affect your pipes. In its own investigation of pinhole leak in copper pipe, the city of Folsom found four different ways water’s ph value could interact with its sulfate content, temperature, bacteria, and/or piping metal to produce the conditions for copper pitting.

Should any of these conditions occur in your pipes, then the chemical reaction will eat away at the protective oxide coating insulating the inner pipes metal from the water running through them. When this coating wears away completely in small places, then that small portion of the pipe is highly vulnerable to corrosion – hence, a pinhole leak forms.

Mechanical damage

Physical contaminants such as sediment or heavy metals present in the water supply may wear away at the inside of your pipes as they pass through. This could occur if your water is particularly hard or only locally treated (if it’s well water, for instance). Abnormally high water pressure may also scrape away the oxide coating of copper piping over time.

Localized damage or poor application of protective coating

It is unlikely but not impossible that your copper pipes are either of a poor quality or were improperly installed. This is more likely if your pipes were retrofitted and/or installed unprofessionally. Damaged copper pipes may not possess the same resistance to corrosion as they should, which can lead to pinhole leaking and other problems.

Non-uniformities in the metal structure

This is particularly likely if your pipes were only partially retrofitted into your home, ie: if your home uses both copper pipes and another type of metal for either piping or connective joints. When two different metals interact, especially in a solvent like water, the resulting tension can wear away at both. In the case of copper pipes, this tension will wear away at the oxide coating inside your pipes, eventually leading to pinhole leaks.

What are the signs there is a pinhole leak in my copper pipe?

Signs of pinhole leak in copper pipe - oxidation of copper pipe

If you suspect you may have a pinhole leak in copper pipe, look for any of the following signs:

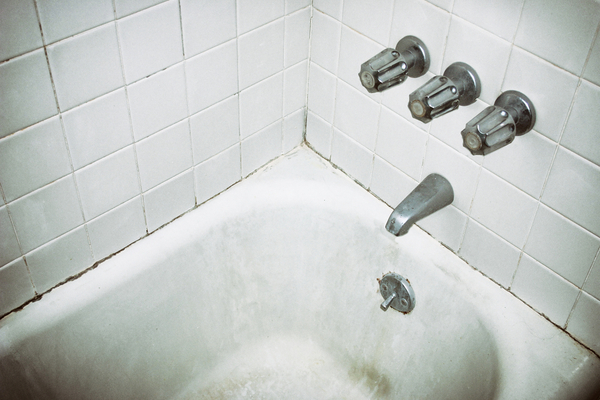
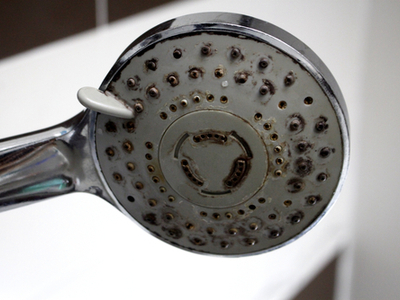
Higher water bill: All leaks will raise your water bill, no matter how smallLower water pressure: Pressure leaks out of pinhole leaks just like water does, which will result in lower water pressure throughout your homeDripping sounds: Try to follow the sound to the leak itself, if possibleWater damage: Especially under or around your pipesMold or mildew growth: Especially near your pipesCondensation on your pipes: The outside of your pipes should never feel moist or wetPipe discoloration: If your copper pipes ever look too brown, green, or blue, then it means they’re partially oxidizing

However, keep in mind that pinhole leaks are notoriously difficult to find. After all, they’re very small and they can occur anywhere along a copper pipe. The best way to look for leaks is to turn off your water and check your water meter. If you’re sure you’ve turned off the supply but the water meter is still moving, then you have a leak. If you have copper piping and a leak, then it stands to reason you may have a pinhole leak.

How not to fix pinhole leak in copper pipe

Before we teach you how to fix your pinhole leaks, it’s important you learn what not to do. This is because there’s a lot of bad advice about repairing pinhole leaks out there. Not only are most of the DIY fixes you can read about ineffective, but in many cases they’ll create new problems.

For instance, you shouldn’t use either pipe repair clamps or replacement pipes affixed with couplings. Pipe repair clamps are fundamentally a temporary solution. They may even introduce chemical and metal alterations to your water, which can further wear away at the pipe. Likewise, couplings and replacement pipe negatively interact with the copper in your pipes. This can create the tension that wears away at oxide coating referred to above. By applying either of these methods to your pinhole leak, you might create a big problem by trying to solve a little one!

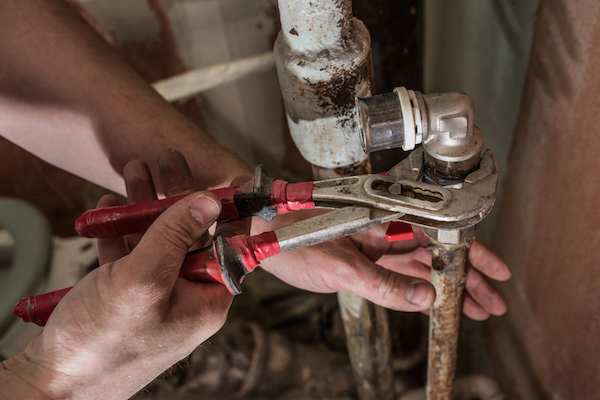
How to fix pinhole leak in copper pipe

Fixing a pinhole leak in copper pipe

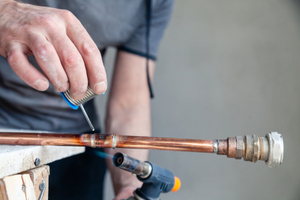
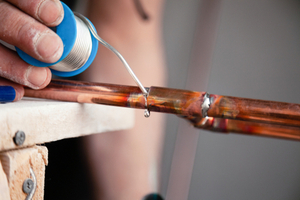
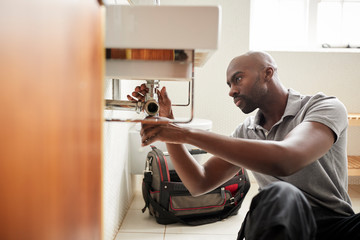
The only truly effective way to fix pinhole leaks in copper pipes is via the “sweating” replacement method. While you can find everything you need to attempt sweat coupling yourself at hardware stores, we generally don’t recommend homeowners try it themselves because it involves soldering and requires significant experience. If you insist on attempting sweat soldering yourself, however, or you’re just curious how it works, this is an overview:

NOTE: sweating pipe replacements are only recommended if you have to repair ½” of copper pipe or less. If the replacement job proves to require more significant replacement, you should call a professional.

Tools required:

Tube cutterCotton ragsMeasuring tapeSweat coupling replacement pipe¾” diameter wire fitting brushSolder wirePropane torch

Steps:

Locate and mark the leak on your pipeTurn off the water main! (this is important!)Drain the pipe of waterCut up to ½” of damaged section and surrounding pipe out using the tube cutterDry the new openings created by cutting away the damaged section. Stuff each side with the cotton rags to keep them from getting wet again. Only remove these cotton rags right before you solderMeasure the gap created by removing the damaged sectionMeasure and cut a replacement section of sweat coupling replacement pipe that’s 1” longer than the gap’s measurementSmooth the rough edges of the replacement pipe with the cutterSmooth the rough inner edges of the pipe with the wire fitting brushClean and smooth the cut sections of attached pipe, as you did with the replacement sectionSlide the sweat coupling replacement pipe over each end of the remaining pipes. Make sure about ½” of the replacement pipe fits over the old sectionSolder the new joint by holding the torch to one side and the tip of the solder wire to the other until enough of the wire melts into the opening to completely fill itTurn on the water and test the repair

How to prevent pinhole leaks in copper pipes

With a little investment and diligence, you can prevent the problems that create a pinhole leak in copper pipe listed above. Here’s how to make sure each one doesn’t give you grief:

Chemical damage

The chemical interactions that wear away at copper pipes typically occur because of high ph value in your water. Investing in a water softener can help prevent the kind of ph values that will harm your copper pipes. If you already have a water softener, make sure it’s functioning correctly and adjust it as needed.

Mechanical damage

A water softener will also remove many of the contaminants that could scrape up your copper pipes over time.

Water softeners won’t affect your water pressure, however. If your water pressure seems abnormally high, you may have to take other measures. Check the pressure meter on your water main. If it seems much too high, then you should ask your municipal water supplier why. If they can’t determine a cause, invest in a water pressure limiter to keep high pressure from hurting your pipes.

Localized damage or poor application of protective coating

If your pipes were improperly installed or look damaged, then we highly recommend replacing them as soon as possible. A professional plumbing inspection can tell you if you need to replace your pipes or if less major fixes are possible.

Non-uniformities in the metal structure

It may be possible to replace outdated joints, fittings, or old segments of pipe used throughout your home. We recommend a professional plumbing inspection to determine where the problematic pipe material is and what we should do about it.


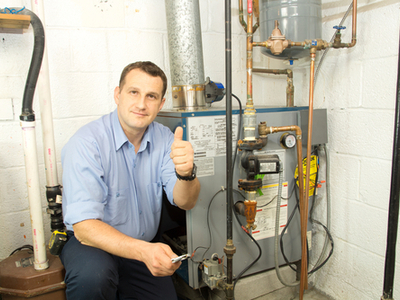
Pinhole leak in copper pipe is a frustratingly common and significant problem for homeowners throughout the US. Fortunately, it’s also an easily fixed problem. If you think you may have a pinhole leak in your copper pipes, all you have to do is call Mike Diamond.

The Smell Good experts can find your pinhole leaks, fix them, and help you make sure they don’t happen again. Your copper pipes are far too effective (not to mention expensive!) for you to tolerate leaks, no matter how small. So stop tolerating and call now!

The post What You Should Know About Pinhole Leak in Copper Pipe appeared first on Mike Diamond Services.

post

What to Do When Someone Puts Dish Soap in Your Dishwasher

>

There’s only one main difference between dish soap and dishwashing detergent, but it’s a big one. Dishwashing detergent does not create suds, but dish soap does. The idea of a dishwasher overflowing with bubbles might paint a funny picture but it’s also big, messy problem. If you accidentally put dish soap in dishwasher once, it’s a headache. If it happens more than once, the soap scum build up could eventually damage your dishwasher.

If the worst happens and you find yourself facing an endless soap avalanche, don’t fret. We’ll tell you how to clean out a dishwasher with dish soap in it. More importantly we’ll tell you how to restore your dishwasher to prevent future problems. If your dishwasher doesn’t work properly after these steps, call the pros at Mike Diamond to help.

How to Fix Dishwasher with Dish Soap in It

First things first, stop the dishwasher immediately. Cancel the wash cycle. If you’re lucky, the suds haven’t quite overflowed just yet. The sooner you turn off the dishwasher, the better your chance of keeping the suds out of the machine’s inner workings.

Once you’ve canceled the cycle, your dishwasher should start draining. It won’t clear everything out, but it’ll make the clean-up process a little less damp.

Clean up any overflow.

If you couldn’t stop the cycle in time, you’ll have some cleaning up to do. Don’t let water sit and seep into cabinetry or floorboards. Use a wet mop to clean up the overflow. Since the mixture is water and soap, wiping it up with dry towels can leave residue behind.

Silver lining: your floor is now clean.

Take out the dishes.

Before you clear out the pipes and drain, you’re going to have more sopping up to do. Open the dishwasher after it finishes its initial draining. Remove the dishes and move them into the sink.

Rinse off the dishes in the sink to remove any scummy residue that might have clung to them during the overflow. Consider washing the dishes by hand just this once, while your dishwasher is… recovering. Otherwise, just rinse them off and leave them in the sink. After you’re done cleaning, you can simply put the dirty dishes back in the washer for another cycle!

How to get suds out of the dishwasher.

This is the labor-intensive part. You’re going to have to rinse out and dry the inside of your dishwasher. If you don’t clean it fully, you’ll continue to have problems with suds and soap scum.

Use a small bowl or pan and repeatedly fill it with clean water to rinse away bubbles. If your dishwasher is close enough to your sink, you could use your sprayer to rinse it out.

Keep rinsing until bubbles don’t appear when you pour the water into the inside and bottom of the appliance. After you’ve rinsed enough, use towels to wipe down and dry out any remaining water. You may have to remove the drawers to complete this step.

Turn on the rinse cycle and let it run.

You don’t have to do a full cycle. Run the rinse cycle for three to five minutes. It should be enough to remove any remaining suds. If you’ve done everything else listed here, you should be free of dish soap in your dishwasher. If there are suds, the rinse cycle will wash out any remaining residue. Once that’s done, your dishwasher should be back in working condition.

Don’t Put Dishwashing Soap in Dishwasher!

Now you know what happens if you put dish soap in the dishwasher. Hopefully you’ve successfully flushed your dishwasher after the soap suds fiasco and lived to tell the tale. The next time this or any other plumbing emergency happens give us a call. The team at Mike Diamond is happy to service your dishwasher to ensure you have clean dishes for a long time.

The post What to Do When Someone Puts Dish Soap in Your Dishwasher appeared first on Mike Diamond Services.

Did you miss our previous article…
https://tkoplumbingco.com/?p=392

post

Why Am I Running Out of Hot Water?

>
Woman running out of hot water before the end of her shower

There are all kinds of reasons why your water heater isn’t producing enough hot water. It could be too small, the settings may be wrong, or there could be a more serious problem. Sediment buildup, broken dip tubes or heating elements, and leaks can all steal your hot water away.

By determining exactly how you’re running out of hot water, you can home in on the problem. Find the description that most closely matches your hot water issue below to find out what’s going on. Once you know why you’re running out of hot water so quickly, you can try to solve it yourself or you can call in the Smell Good Cavalry:

Your water comes out in spurts of hot and cold

If your hot water seems to run hot and cold randomly regardless of what you tell it to do, then there may be sediment build-up in your water heater’s tank. Sediment builds up faster when you have hard water, when your pipes are old, or if your anode rod is worn out. Sediment build-up leaves less space for hot water in the tank. It can absorb too much of the heat generated by the heating element.

First, try flushing and draining the tank. We recommend either doing it yourself or having the pros perform a full drain and flush around once per year. If you keep running out of hot water even after a flush, then it’s possible that too much sediment has built up. Unfortunately, the only way to solve that problem is to replace your tank. In fact, you should replace it quickly… or it could, uh, explode.

You keep running out of hot water after a very short period of time

Man running out of hot water during a shower

Most water heaters have two heating elements: one at the top, and one at the bottom. The top heating element repeatedly re-heats the water near the top of the tank. The bottom heating element heats all the water added to the tank to store it at a constant hot temperature. At least, that’s what it should be doing.

If your bottom heating element stops working, then it isn’t heating most of the water in your tank properly. Instead, you’ll be forced to rely on the small quantity of water your top element heats. When that water runs out, your water heater will send you unheated water instead… which makes for the nasty shower surprise you’re all too familiar with. To fix this problem, replace your tank’s bottom water heater element. Give us a call and we’ll take care of it fast.

Your water never gets above a lukewarm temperature

The water heater’s dip tube pushes the cold water to the bottom of the tank. There, the lower element heats it before you use it. If your water heater’s dip tube breaks, then all the replacement cold water added to the tank mixes with the hot water already inside. As a result, you get a lukewarm mixture of hot and cold water that satisfies nobody, like a reverse Goldilocks.

If your dip tube is broken, you may discover small chunks of plastic in your showerhead or sink strainers. Take off your showerhead and look for debris. If you find any, then you could try to test and replace your dip tube yourself, or call in the pros. Replacing a dip tube is relatively cheap, quick, and easy.

You’re running out of hot water before everyone is finished with it

water heater sizes. If your water heater is constantly running out of hot water, it may be too small for your home

Does this sound familiar? You’re locked in a constant competition against everyone in your home to seize the bathroom first thing in the morning. If you’re unlucky enough not to be the early bird, then you’d better shower quickly or risk a rude (and cold) awakening. And forget about showering while someone’s washing dishes, running the dishwasher, or doing the laundry – that’s a one way ticket to your own private Antarctica.

Your water heater is probably simply too small. Conventional water heaters can supply an amount of water equal to the size of their storage tank. If you use more water than the tank can provide, then your heater spends 20 to 30 minutes reheating new water. If your water heater is too small for your needs, you’ll have to replace it with a bigger one.

You’re not getting any hot water at all

Did you know that your water heater has a thermostat that dictates how hot your water gets? It works just like any other thermostat: you tell it how hot you want your water, and your elements heat to that temperature. If you’re not getting any hot water at all, then your thermostat may be malfunctioning… or simply set improperly!

Most water heaters have a reset button. Troubleshooting your thermostat is as easy as clicking that button. In case that doesn’t work, locate the thermostat itself and make sure it’s set correctly. If you still have the owner’s manual, the manufacturer should have included the settings inside. If you’re like 99% of people and you have no idea where that manual is, find the settings online. Reset to the heat you want, then try resetting again. If that still doesn’t do the trick, give us a call.


If you don’t see your particular issue listed here, don’t worry. These scenarios cover the common problems, but they’re by no means exhaustive. If you still don’t know what to do after either failing to find your problem or trying our proposed solution to no avail, you still have your trump card: us.

Whatever the strange, unique, unlikely reason you’re running out of hot water, Mike Diamond’s experts will find it and will provide a solution. We’ve yet to be stumped by even the most outlandish of hot water hang ups – and we’ve seen some doozies. Next time your shower takes an unpleasant turn for the freezing, just give us a call right away. Or at least… as soon as you get out and warm up.

The post Why Am I Running Out of Hot Water? appeared first on Mike Diamond Services.

Did you miss our previous article…
https://tkoplumbingco.com/?p=381

post

Is My Garbage Disposal Leaking?

>
Garbage disposal leaking from reset button

Garbage disposals usually leak from three places: the top, the pipe connections, and the bottom. To find out if your disposal is leaking, check each common place where leaks start. Use a flashlight to check for condensation, puddling, and other signs of water accumulation on or beneath your disposal.

Each common garbage disposal leak happens for a different reason. Usually, a minor component is simply too loose or it’s worn out. By finding where your garbage disposal is leaking, you’ll be able figure out why it’s leaking and how you can fix it. Here’s everything you need to know to fix your garbage disposal’s leak quickly and accurately.

Where is my garbage disposal leaking from?

Garbage disposals commonly leak from four different places:

The sink flange at the top of the garbage disposal. This connects the disposal to the top of the sink.The dishwasher hose connection on the side of the disposal. This is where the flexible plastic dishwasher hose connects to the disposal.The drain line connection, also located on the side of the disposal. This is where the main drain pipe connects to the disposal via curving metal or PVC plastic pipes.The reset button on the bottom of the disposal. This button deactivates the disposal if it jams or the motor overloads.

How can I tell if my garbage disposal is leaking?

Garbage disposal leaking from either the side or bottom

First, look for the obvious signs. Check under your kitchen sink for puddling water, dampness, dripping, or a musty smell. If you see any signs of leaking, check to make sure it isn’t the sink itself or the sink’s p-trap. Then, grab a flashlight and bucket to look for each common garbage disposal leak.

Turn off the garbage disposal and unplug it completely. Then, fill up the sink with water about halfway. If you have food coloring, add it to the water to make the leak easier to spot. You can locate the leak in the following ways:

The sink flange: Check for dripping or water accumulation around the top and bottom of the ring of the flange. Use the flashlight to look for water coloring and feel for wetness by hand.The dishwasher hose connection: To properly look for this leak, you’ll have to run your dishwasher. Start the dishwasher without turning back on the disposal. Watch the hose as water runs from the dishwasher drain through it into the disposal. Pay particular attention to the connections between the hose and disposal.The drain line connection: Check the connection between the drain line and disposal. Pay particular attention to the screws that fasten the line to the disposal and to the gap between the disposal and drain line.The reset button: The reset button is in the center of the bottom of the disposal unit. Shine the flashlight under the disposal to look for it. Check for a slow, constant dripping or water accumulation beneath the unit.

Why is my garbage disposal leaking?

Each of the four common leaks outlined so far have different causes and fixes. Here’s where your leak is coming from and what caused it:

The sink flange: The sink flange is held in place by plumber’s putty and bolts. If the putty deteriorates or the bolts rust or loosen, the watertight seal between the flange and sink may break, leading to your leak.The dishwasher hose connection: If the dishwasher hose is leaking, it’s usually because the screws holding it to the disposal have loosened. This can happen because of rust or simply as a result of time and jostling. It’s also possible the drain hose or clamp are leaking.The drain line connection: If the drain line is leaking, then either the screws securing to the disposal have worn out, or the rubber gasket inside the mounting assembly itself is leaking. Remove the screws, take down the drain line, and check the gasket inside for signs of wear and tear.The reset button: If your garbage disposal is leaking from either the reset button or any other part of the bottom of the disposal, then it probably means a seal inside the unit itself has worn out. This can happen when a garbage disposal gets old.

How to Fix a Leaking Garbage Disposal

Repairing a garbage disposal

Now that you’ve identified the where and why, you’re prepared to fix the actual problem. Luckily, fixing a leaking garbage disposal is usually pretty straightforward–even if the fix isn’t always what you’d like to hear:

The sink flange: Unscrew the bolts and check for rust or other deterioration, and replace them if you find any. Then, remove the flange, scrap off the putty holding it in place, and reapply fresh putty. Turn back on the water to test the seal.The dishwasher hose connection: First, try using a screwdriver to tighten the screws on the metal clamp connecting the hose to the disposal. If the screws don’t seem to tighten properly, consider replacing them. It’s also possible the hose itself is leaking, in which case you’ll have to replace it.The drain line connection: You may be able to fix this leak by tightening the connection between the pipe and disposal. Try un-attaching and reattaching the pipe if tightening doesn’t work. If you’re still having issues, try replacing the screws or gasket. You could also use a pipe clamp and tighten with a screwdriver.The reset button: Unfortunately, if your garbage disposal leaks from the bottom, then it’s probably simply time to remove the garbage disposal and replace it. If one internal seal is worn out, after all, then the rest are probably getting there too.


By following the directions above, you should be able to identify and fix just about any garbage disposal leak you’re dealing with. Of course, “should be able to” doesn’t necessarily mean will be able to. Sometimes unusual leaks happen. These leaks can be tough to figure out, much less fix!

Whether you have a weird leak you can’t get a handle on, or you just need to ask some questions, feel free to call Mike Diamond any time. We’ve got everything we need to handle any garbage disposal problem you can throw at us.

The post Is My Garbage Disposal Leaking? appeared first on Mike Diamond Services.

Did you miss our previous article…
https://tkoplumbingco.com/?p=376

post

How to Clean Mold in Showers

>
A white tiled shower with dark mold stains.

There are thousands of types of mold. Mold spores travel through the air around us every day. Once these spores settle, they can reproduce in 24-48 hours. All they need is a moisture and oxygen. Bathrooms and showers provide the perfect breeding ground for mold to grow.

Unlike mildew, which forms on surfaces, mold is a fungus that can penetrate porous materials. If you see black or green gunk in the corners of your tiles and caulking or dark spots along walls, you probably have mold.

Molds carry health risks, especially for people with acute illnesses and compromised immunity. We’ll show you how to clean mold in showers to avoid these health risks. We’ll also give to tips for preventing mold in your bathroom and your home.

What Kind of Mold is in Your Bathroom?

Diagram of different types of mold.

Molds come in three different classifications:

Allergenic:  Causes an allergic reaction or asthma-like symptoms.Pathogenic: Harmful to people with acute illness or compromised immunity.Toxigenic: Dangerous or even deadly to everyone.

Unfortunately, it can be difficult to tell different kinds of mold apart. Black mold in showers could be Stachybotrys – the most toxic “black mold” – but it could be Alternaria or Aspergillus, two common household molds.

You can have your mold tested to determine what variety it is, but the CDC recommends treating all molds as harmful. It’s best to remove and clean any mold as quickly as possible.

8 Steps to a Mold-Free Shower

To fully get rid of black mold in your shower, orange mold in your shower and mold in shower grout, use a cleanser specifically designed for mold. While bleach is often touted as the best way to get rid of mold, it doesn’t fully address the problem. Bleach is good at removing mold stains and surface mold, but it doesn’t kill fungus that has soaked in.

If you prefer not to use a commercial detergent, you can create a 1:1 solution of hydrogen peroxide and water or white vinegar and water to kill deep-rooted mold.

A woman scrubs mold from shower grout with a toothbrush.

You will need:

CleanerSpray bottleRubber glovesCleaning clothScrub brush with stiff bristlesToilet paper or paper towelBleachVinegar

To perform a thorough cleaning, follow these steps:

Spray down all affected areas of shower with detergent or cleaning solution.Let soak for 20 minutes-hour.Apply rolled paper towel or TP in cracks and along tub rim to keep cleanser soaking against mold.Scrub vigorously with brush.Rinse and wipe with clean water.Scrub any stained areas with bleach.Rinse and wipe.Spray with white vinegar and let dry.

The final step is a preventative. White vinegar inhibits mold from growing and will reduce the chance of mold returning to your shower.

If you have significant mold growth or are worried that you have toxic mold, consult a professional remediator. Don’t take on large mold projects yourself.

Never paint or caulk over moldy walls/ cracks. You won’t stop the mold from reproducing or being a health risk. Replace old moldy caulk with new, mold-resistant caulking.

 Remove Mold from Shower Head

A moldy shower head.

Shower heads inevitably build up with mineral deposits and sometimes mold. If you’re wondering how to clean all those small nozzle holes, here’s a trick.

Put a 1:1 solution of white vinegar and water in a plastic bag. Place the bag over your shower head and seal it shut with rubber bands. Let your shower soak in the solution overnight. The next morning your shower head will be like-new and, best of all, mold free.

How to Prevent mold in Showers and Bathrooms

The best way to get rid of mold is to prevent it from being able to form. Follow these practices to limit mold from growing in your shower.

Turn on an exhaust fan or open a window when showering.Keep humidifiers at 50% or less.Clean your bathroom often with mold-killing products.Fix leaks, drips and other sources of moisture.Change air filters frequently.Don’t leave wet towels or laundry on floor.Spray vinegar on shower walls regularly to prevent mold growth.

By keeping a dry, clean home, you significantly limit mold’s ability to grow. Regular bathroom cleaning and maintenance means no ugly dark stains on tile or grout.

Plumbing Issues Related to Bathroom Mold

If you have mold in your bathroom from leaky pipes, bad drains or drippy faucets, Mike Diamond can help. If you’re in Los Angeles or the surrounding area, schedule service with a certified plumber to evaluate and repair your plumbing issue today.

The post How to Clean Mold in Showers appeared first on Mike Diamond Services.

Did you miss our previous article…
https://tkoplumbingco.com/?p=370

post

What to Do if Your Tap Has Rusty Water

You just woke up and you’re about to brush your teeth. You stick your brush under the tap, turn the water on, and… a stream of brown, cloudy mush drizzles out.  Rust colored water isn’t normally harmful but it can be disturbing.  The causes can range from corroded pipes to mineral build up to utility company operations.

Seeing your home’s tap water turn rusty is a traumatizing experience, especially if you don’t know why it’s happening. That’s why we put together this primer to explain why your water is rusty looking. If the reason for your home water discoloration is rusty pipes, we’ll explain what you can do about it. We want all Los Angeles residents to have clean, safe drinking water in their homes.

iron, one of the elements that makes water look rusty

What Makes Water Brown?

Tap water looks rusty brown, yellowish, or reddish when it contains an excess of sediment or minerals.

The most common discoloring minerals present in water are iron and manganese. Tiny metallic deposits of these minerals can get into the water stream via several different sources – natural or manmade. These minerals can also be responsible for any unpleasant tastes or smells your water might have.

Is Rusty Water Dangerous?

It depends on the particular minerals in your water, but probably not. The EPA regulates the treatment of drinking water contaminants according to primary and secondary standards. Dangerous contaminants like lead and arsenic are covered by the primary regulations. If these contaminants exceed a maximum contaminant level in a water supply, it (usually) isn’t supplied to the public.

The secondary EPA regulations cover contaminants like iron and manganese. These contaminants aren’t dangerous to health but taste, smell, or look bad and could stain clothing or cause skin rashes. Public water systems are compelled to test for primary contaminants on a regular basis but testing for secondary contaminants is unfortunately voluntary. Rusty water might be gross and inconvenient, but it’s not actually dangerous to drink or bathe in.

Rusty pipes

Why Is My Water Brown?

Any of the following symptoms could cause brown water from the faucets in your home. Diagnose your water problem using these three common scenarios:

If all your hot and cold water suddenly goes brown:

It may be the result of a nearby break in a city-operated water main or fire hydrant. Much of America’s plumbing infrastructure is outdated, so water main breaks that release sediment into the water supply happen frequently.

It’s also possible that either your water heater or your water supply pipes have become rusty or corroded, and you’re just now starting to see the effects.

If only your hot water is discolored:

Sediment or rust may have built up in your water heater’s tank.

If you get brown water from your cold tap and only certain faucets:

The problem is probably with a particular water supply pipe.

fixing rusty pipes

How To Fix Reddish Brown Water

Now that you have an idea of what caused your rusty water discoloration in the first place, you know where to start:

If all your hot and cold water suddenly goes brown:

Call your water supply company. Chances are, something happened to a water main or a nearby fire hydrant. It’s also possible that the city is conducting maintenance on the pipe system, and they inadvertently stirred up some sediment. They should be able to tell you when your water will clear up again and what they’re doing to fix the problem.

Once the utility work is done, run your taps for a few minutes until you no longer see orange water coming out of your faucets. Brown water in toilets should disappear after a couple of flushes refresh the water supply.

If all your hot water is discolored:

Try draining and flushing your water heater’s tank. Rusty hot water is often the result of sediment that’s built up over time. It’s a good idea to drain and flush your tank twice a year. Sediment buildup isn’t just bad for your water; it’s one of the most common causes of water heater leaks.

If you flush the tank or have a newer water heater and your hot water is still off-colored, you may have a more significant problem. Call a professional plumber to diagnose the issue. Too much sediment buildup could permanently damage your water heater, or (in rare and extreme circumstances) cause it to explode!

If your cold water is only discolored when it comes out of a few faucets:

Start by running those faucets at full pressure for about several minutes or until the water clears completely. Sometimes, a small amount of rust may dislodge from the inner walls of a pipe and enter the water supply. If the problem is that minor, simply running the water should clean out the rust and clear the water again.

If your water still looks rusty after running it, however, or if the problem returns shortly after you flush the rust, it may be because your pipes have corroded. When too much corrosion or rust builds up on the pipe walls of your home’s water supply pipes, then minerals will leach into your water constantly, and you will continue to have brown water from your cold tap.

If you have a corroded or rusted pipe, you should have it deep cleaned or replaced ASAP, before it causes even more serious problems.  Corroded pipes can lead to clogs and possible leaks or breaks in your water line.

Get Rid of Brown Rusty Water in Your Home

If you’ve tried everything and remain frustrated by rusty water coming from your tap, remember that Mike Diamond has your back. Give us a call, and we’ll diagnose why your faucets are spewing out that ugly brown stuff and make sure your pipes are transporting clean, clear water to you and your family.

Nobody in Los Angeles should have to shower in–much less drink!–rusty water. We’ll make sure you never have to.

The post What to Do if Your Tap Has Rusty Water appeared first on Mike Diamond Services.

Did you miss our previous article…
https://tkoplumbingco.com/?p=363

post

Gas Furnace Maintenance Tips to Keep the Heat Coming

>

Even if winters don’t exactly get Arctic-cold in Southern California, it doesn’t mean that you want your gas furnace to go out. The best way to avoid potential trouble on those chilly evenings is with regular furnace maintenance. Keeping your furnace clean and in good working order means it’s always ready for that unexpected cold front.

To keep your gas furnace working when you need it, we recommend an annual furnace checkup. During the rest of the winter, follow these seven furnace maintenance tips to keep the heat coming:

Work under safe conditions

Before you do anything, make sure you’re working safely. Gas can be dangerous if you don’t handle it correctly. Before you begin any serious furnace maintenance, make sure you turn everything off. If you’re not 100% sure what you need to turn off to get the work done, trip the main circuit breaker to verify your safety during the maintenance process.

Finally, if you smell gas, don’t try to shut anything off or turn it on–instead, leave the premises immediately. Have a professional flush the gas from the house and fix the leak before you do any more work.

A Los Angeles homeowner easily replaces their furnace filter
How to Check Your Furnace Filter

A gas furnace’s filter prevents dirt from entering the unit and building up. Build up can lead to malfunctions or even fires. A filter also keeps the warm air blown into your home clean. Check your filter at least once every other month. This holds true for summer as well as you run your air conditioner.

Your filter is simply a cardboard rectangle with a mesh covering. It easily slides in and out of its designated slot, usually at the bottom of your furnace. You can find most replacement filters at your local hardware or home improvement store.

Test your thermostat

If the temperature setting on your thermostat doesn’t match the actual temperature, you may have one of two furnace-related problems:

The thermostat itself has stopped working.There’s a disconnect between the wall unit and the furnace.

Either way, if this happens frequently, you’ll want to repair or upgrade your thermostat. A new, programmable energy efficient thermostat isn’t expensive and usually pays for itself in energy cost savings.

Clean the blower

While checking the filtration system, also check the blower. The blower is further inside, and you should be able to see it when you change the air filter. It’s a circular intake with a wheel-like fan.

Wipe the blower down with a damp cloth each time you change the filter. Cleaning the blower prevents dust or dirt that may have escaped through the filter from getting further inside the furnace.

Cleaning exterior vents is part of annual furnace maintenance.
Regularly check and clean your vents

All gas furnaces have a venting system that prevents unsafe heat build-up. Just like with anything else that never moves, dust builds up both on and within furnace vent systems. Clean them with a scrubbing brush, vacuum cleaner, and damp cloth to ensure their continued effectiveness.

Inspect your flue pipe for cracks or holes where dangerous carbon monoxide could leak.

Inspect the fan

This maintenance is best left to a professional. It isn’t as easy to get to the fan within the furnace as it is to get to everything else. Getting pre-winter furnace maintenance is recommended to keep up with part changes and cleaning needs. Don’t let small problems become big.

Clean Your Air Ducts

Vacuum them out or have a professional do it. Dust, pet dander and debris that builds up inside your ducts eventually gets blown all over your home. Clean ducts work better and mean cleaner air.

 Annual Furnace Maintenance in Los Angeles

Keeping your furnace clean is the easiest way to extend its life and keep it from breaking down. Hopefully this furnace maintenance checklist helps you get started.

Not everyone is up to this level of DIY maintenance. If you want a certified technician to perform your gas furnace cleaning, the trained professionals at Mike Diamond are ready and waiting to help you out.

The post Gas Furnace Maintenance Tips to Keep the Heat Coming appeared first on Mike Diamond Services.

Did you miss our previous article…
https://tkoplumbingco.com/?p=357

post

A Plumbing Expert Can Fix Problems With Your Plumbing System Within No Time

Plumbing experts deal with significant plumbing repairs or even new bathroom or kitchen plumbing construction. They deal with everything from clogged drains and toilets, to grease trap and backflow testing, from leak detection to full-on bathroom installation. Plumbing experts do it all from the best plumbing companies. 

The plumbing system of your home is subject to extreme temperatures, constant exposure to humidity, chemicals, and bacteria. Hiring professional lPlumbing contractors is essential to get the best quality service. If you do not have a plumbing system, it is recommended that you carry out an on-site inspection before starting any plumbing repairs. Once you have a basic understanding of the condition of your plumbing system, then you can better assess the nature of any plumbing problems that need your attention. Professional plumbers will carry out a thorough inspection of the premises before recommending any repair works.

Inflatable tanks are one of the most common causes of plumbing problems. If your tank gets damaged, it can be challenging to access the pipes under the tank. However, experienced plumbing experts can quickly locate the damaged pipes under your tank. Once you have found the lines, it becomes much easier to fix the plumbing. With the help of your plumbing expert, you can replace the old, damaged, or malfunctioning pipes with ones that are in good condition. A professional plumber can also advise you on the best possible options that will help you maintain the plumbing system in your house for a long time without any significant complications.

Cracks and damages around faucets can be pretty intimidating for the inexperienced user. Expert plumbing repair experts are well equipped with the latest tools and gadgets to fix such issues at a fraction of the cost. Repairing minor plumbing issues can cost you less than repairing a big problem. This is because when you call an expert, he will gather all the relevant tools you will need and give you a detailed quote of the cost of the plumbing work. You can get estimates from various plumbing companies based on the scope of work, type of damage, and other specifications.

It is essential to hire an expert plumbing service provider when you encounter problems with your gas or water heater. Water heaters are costly, and most of the time, people do not replace them when they break down. However, if you want to avoid spending thousands of dollars for the replacement, it is advisable to call a professional before calling your mechanic to solve the problem. Plumbing companies are equipped with the latest tools and gadgets to repair common plumbing issues, and they can even make recommendations on better maintenance of the water heater.

If you have made the mistake of using the wrong type of plumbing pipe in your house, the chances are high that you will face substantial plumbing bills every month. Calling a plumbing expert at the first instance will help you save a lot of money as he will fix the broken pipes at a fraction of the cost of replacing them. There are different types of plumbing systems: burst pipes, faulty pipes, clogged pipes, and much more. Therefore, if you experience problems with your lines at home, it is advisable to contact a plumbing expert immediately and fix the problem.

It is advisable to do a little research work before hiring a plumbing expert. There are plenty of online professionals who have uploaded their services on the internet. Take a little time out to research the websites of these plumbing experts and check out their qualifications, reviews, and other credentials. This will ensure that you are hiring an expert who is qualified to work on your plumbing system.

Another essential aspect to consider when hiring plumbers is the pricing structure. Most people often fall into the trap of paying for unnecessary charges when replacing blocked pipes or producing a new hot water tank. Do not pay extra for emergency services because this may lead to further damage to your plumbing system. If you feel the need to contact a plumbing expert at any point, even if to ask about a particular plumbing problem, do so immediately. This will help prevent the issue from becoming worse.

You can also visit our other websites and post your article.

Open Mind Design VT , RCUD More Electric  , Lancaster PA Contractors ,  LC Day Of Caring , TKO Plumbing Co ,  Colorado Springs Co Roofer , Tavolo App ,  Computer Medics OFCE , Computer Medics Of Central Wisconsin ,  Triad Works  , Grease Trap Cleaning Houston  , Thick Business Band  , Digipos-Solutions , Bromleys-Hillhurst ,  Maritime Bethel At Savannah ,  The Weekly ,  Metal Lurg Aluminium  , Benton City EDC , SQ Sourcings,  R Tech Perrformance ,  My Money Life  , Protect What Com ,  Population In Perspective  , AST Marketing Group Exit Strategy , Future Of Workni ,  Elliston FD ,  Ebook Ebook ,  Kennesaw Landscapes,   Fjord Husreivers  Reach Of Jackson , The St Petersburg Home Inspector  , Loughborough Innovation  , Mid South Cleaners ,  Meadowbrook Farm,   Rash Design , Concrete Style,  Diamond Landscapes Colorado ,  New England State Map  , Birmingham Best Tree Service

post

Let Us Fix Your Drainage Problems

When you need a drain repaired, let professionals be the ones you call for assistance. When you’ve had repeated difficulties with a particular drain, especially in terms of it constantly clogging, even with professional help, it may be time to get the drain repaired as soon as possible. A faulty drain will often lead to a more costly problem, so make sure to let a reliable Drain Repair San Jose service fix your gutter for you. A good plumber or drain cleaning service will give you the best service available for drain repair.

drain cleaning

There are several different reasons why you might need a drain repaired, and there are also a variety of different kinds of solutions for drains. From simple blockages to more tough clogs, a qualified professional can address many drain repair needs. The most common drain issues arise from simple blockages, but drains are other less mundane reasons to stop operating as effectively as they should. Even clogged drains can sometimes become blocked themselves, so this is also another reason why you might need a repair. Professional drain cleaning services know all about the causes of clogs, which allows them to offer various solutions.

Clogs are a problem that can plague any plumbing system, but they tend to affect drains in more unusual ways. While a few clogs result from food and beverage residue blocking the pipes, many clogs result from a buildup of materials like grease or hair. This means that any drain repair needs to involve more than just examining the main sewer line. Instead, a professional will be able to investigate your drains individually based on the warning signs presented to them.

One of the most common drain clogs is slow to drain repair. As soon as you notice that water isn’t draining quickly enough from your sink or tub, get out a flashlight and look for the problem. Several things could cause a slow drain issue, so it’s essential to make a list of possible culprits before calling a plumber. Common causes include:

  • Poor flooring or tile installation.
  • Poor surface drainage.
  • Standing water in a pipe.

Some of these issues can be fixed with simple household adjustments, while others may require the expertise of a licensed plumber.

Another common problem that plumbers can address is tree roots. Roots in drains can cause several problems, from making it impossible to flush the toilet or drain field to making it difficult to clean. For drain maintenance in the kitchen, slow draining sinks and pots can be solved by pruning the roots in the line. For larger clogged drains, a rooter service might be needed to obliterate the tree roots.

Tree roots can also break off plumbing pipes, create a clog, or cause sewer lines to back up and destroy sewer lines. Tree roots can also dislodge pipes, causing them to become backed up and overflowing. This can also lead to a blocked sewer line, which is extremely serious. However, a professional can easily take care of this problem in a timely fashion. In most cases, all that will be needed to address the clog is an extension ladder, a pry bar, and some drain-cleaning chemicals.

There are many other drain-related problems that plumbing professionals deal with daily. One of the most common issues is seepage through plumbing pipes, especially in the bathroom. Leaking water pipes can cause damage to countertops, sink tops, and even floors if they are not attended to right away. In addition, old or rusty piping can be very dangerous, as they are more likely to rust over time. Drainage service professionals can address many of these issues on-site or send their workers to a local plumbing shop to repair the problem.

For more minor issues, such as broken drain screens, a plumber may be able to fix the problem on his own. More minor plumbing repairs, such as broken pipe screens, often don’t require the services of a professional repairman unless the broken drain poses a threat to someone’s health or the safety of someone else’s property. To ensure that this type of problem is fixed correctly, contact a local plumbing contractor in your area to let us know what you need to do and see if we can help you. If we cannot repair your issue on our own, we can refer you to someone who can. Drain repair needs to be carefully handled, as letting this type of issue go without repair can lead to severe complications and even potentially dangerous situations.